Attaching Thread Posts using Bolts
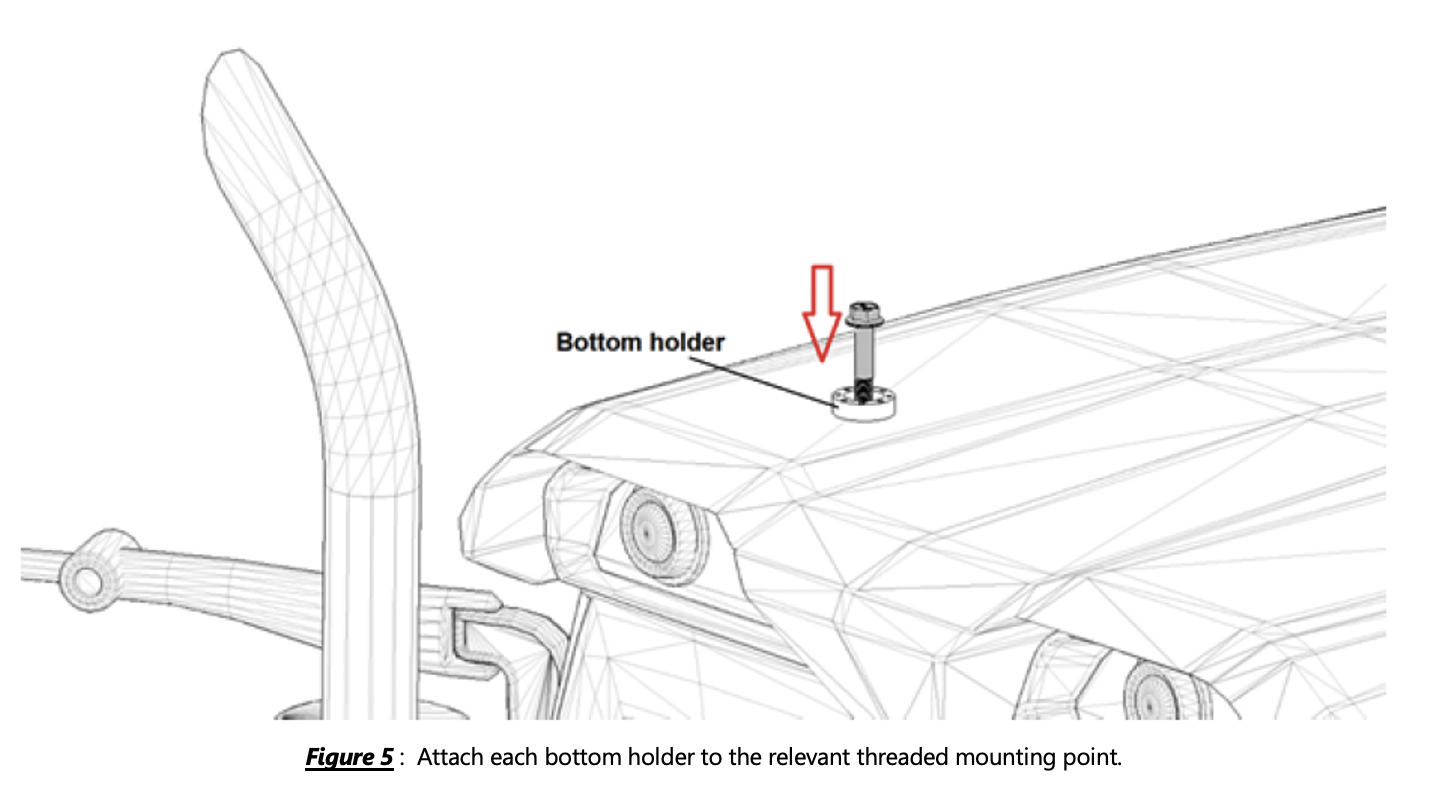
1. Secure a bottom holder on each threaded mounting point using bolts supplied by the tractor manufacturer. If required, use a washer between each bolt head and bottom holder in order to achieve the largest possible contact area.
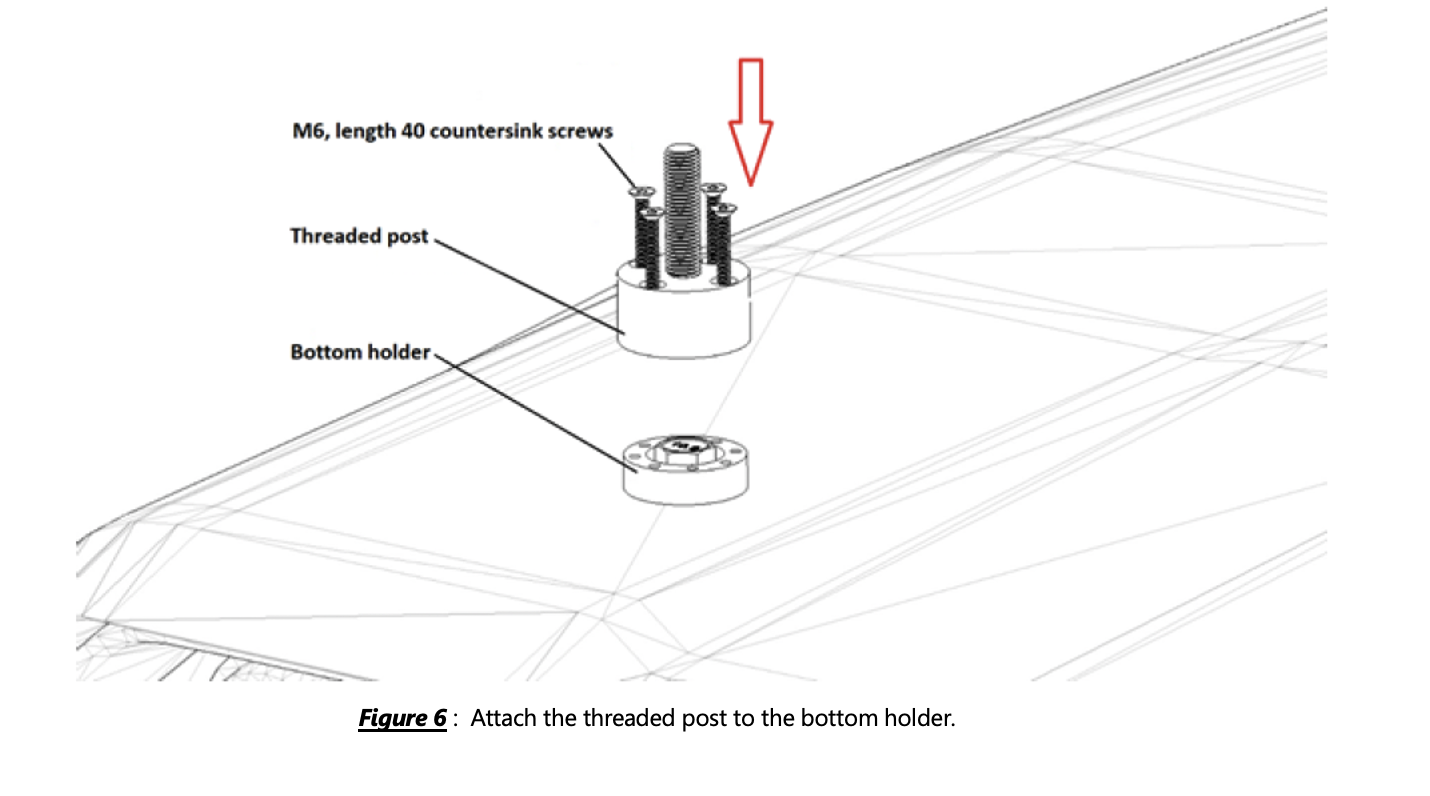
2. Attach the threaded post to the bottom holder using the M6, length 40 countersink screws (all provided). Then, repeat to install the second threaded post on the other side of the tractor cabin roof.
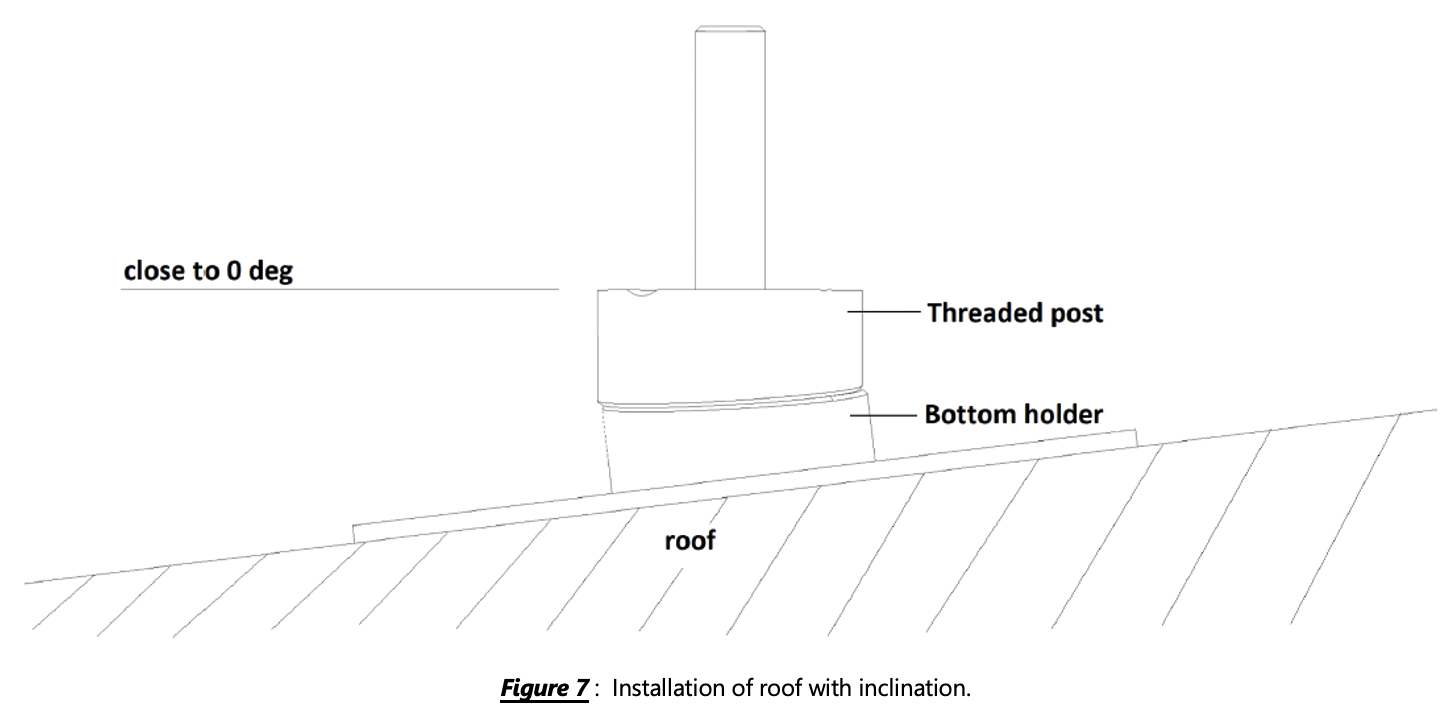
For a tractor’s roof with inclination, the assembly of bottom holder to threaded post can be adjusted accordingly to follow inclinations up to 10 degrees.
Both items have a “wedged” surface and when the threaded post is rotated and secured in different positions on the bottom holder, a different angle can be achieved. Before starting the installation on an inclined roof:
-
Secure lightly the threaded post on the bottom holder in the position for 0 degrees using only two M6, length 40 countersink screws.
-
Place the above assembly on the desired position on the roof.
-
Move the two screws one position clockwise and rotate the assembly checking the inclination of the top surface of the threaded post.
-
Repeat the above until you find the correct position for the screws where the top of the threaded post is parallel to the ground.
-
Mark the position of the screws with a permanent marker and make sure that the position of the bottom holder is also marked before proceeding to installation.
The exact inclinations that can be achieved with the above assembly can be found in the table below:
| Bottom Holder Adjustment | |||||||
|---|---|---|---|---|---|---|---|
| Position | 0° | 1 or 1' | 2 or 2' | 3 or 3' | 4 or 4' | 5 or 5' | 10° |
| Degree Angle | 0 | 2.59 | 5.00 | 7.07 | 8.66 | 9.66 | 10.00 |
Last Revised: Jun 2025