for Patriot/Trident
|
|
|
|---|---|
|
|
The implement or machine must remain stationary and switched off with booms or implement sections unfolded and supported during installation or maintenance. |
 warning
|
caution |
|
|---|---|
|
|
When installing hydraulics or performing diagnostics, maintenance, or routine service, ensure precautions are taken to prevent any foreign material from being introduced into the machine hydraulic system. Objects or materials that are able to bypass the machine hydraulic filtration system will reduce performance and possibly cause damage to the hydraulic valve. |

|
notice |
|
|---|---|
|
|
The appearance of the hydraulic valve may vary slightly from the images contained in this manual. However, the fittings, hose connections, and cable connections remain the same. |

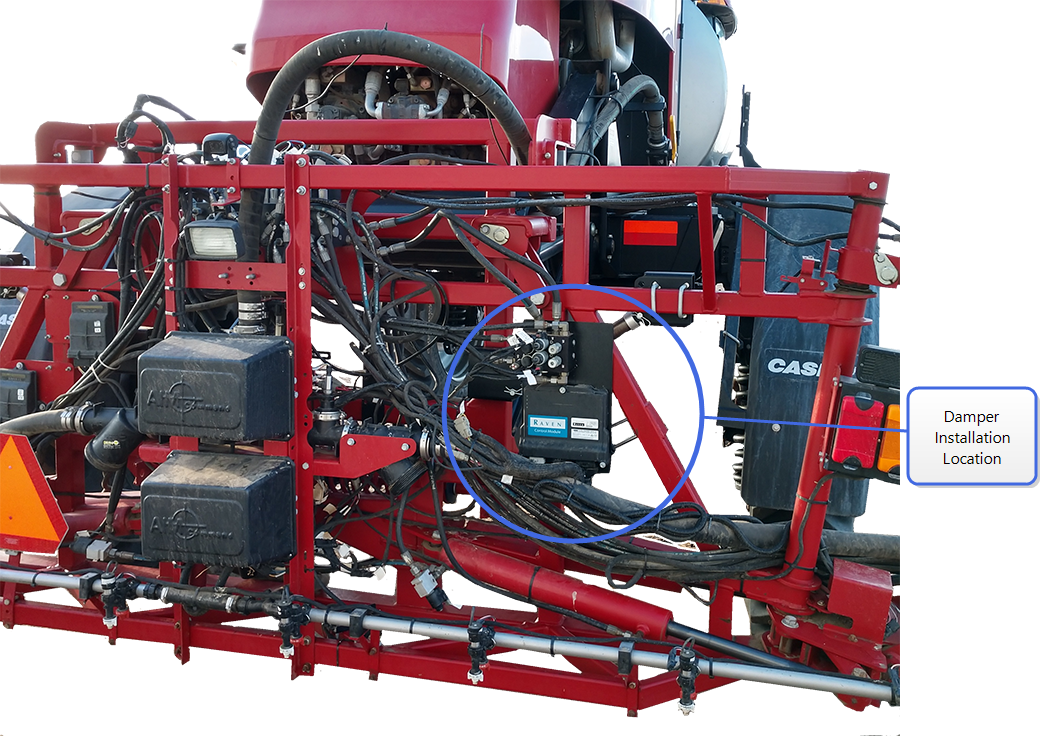
For optimal performance, install variable dampers on the machine center rack:
-
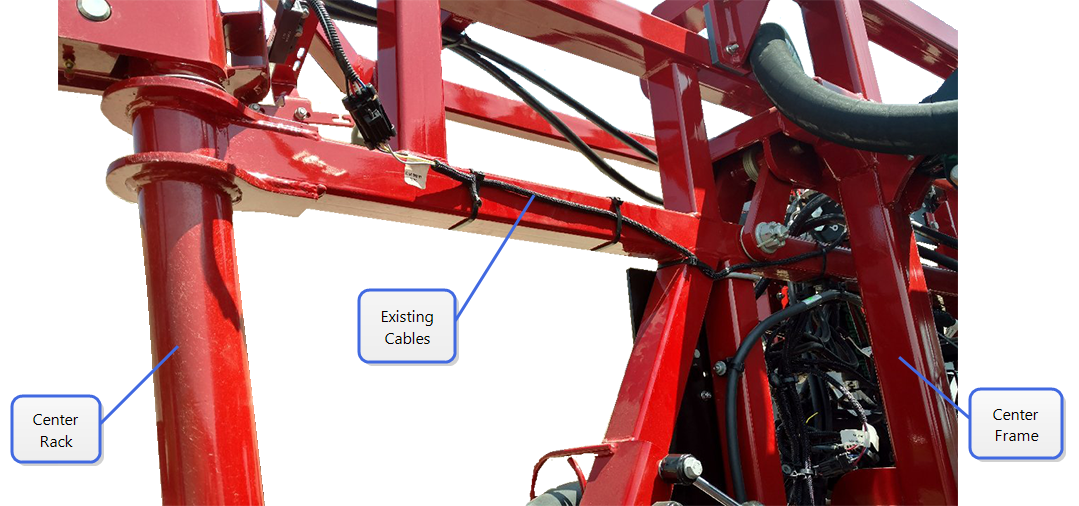
Identify the damper installation location. This is on the right side of the center rack just below where the existing cable is routed.
Note: Weld studs on the center rack may need to be removed for proper damper installation and operation.

-
Remove the cable ties that secure any cables that may be in the way when mounting the damper brackets to the boom center rack.
-
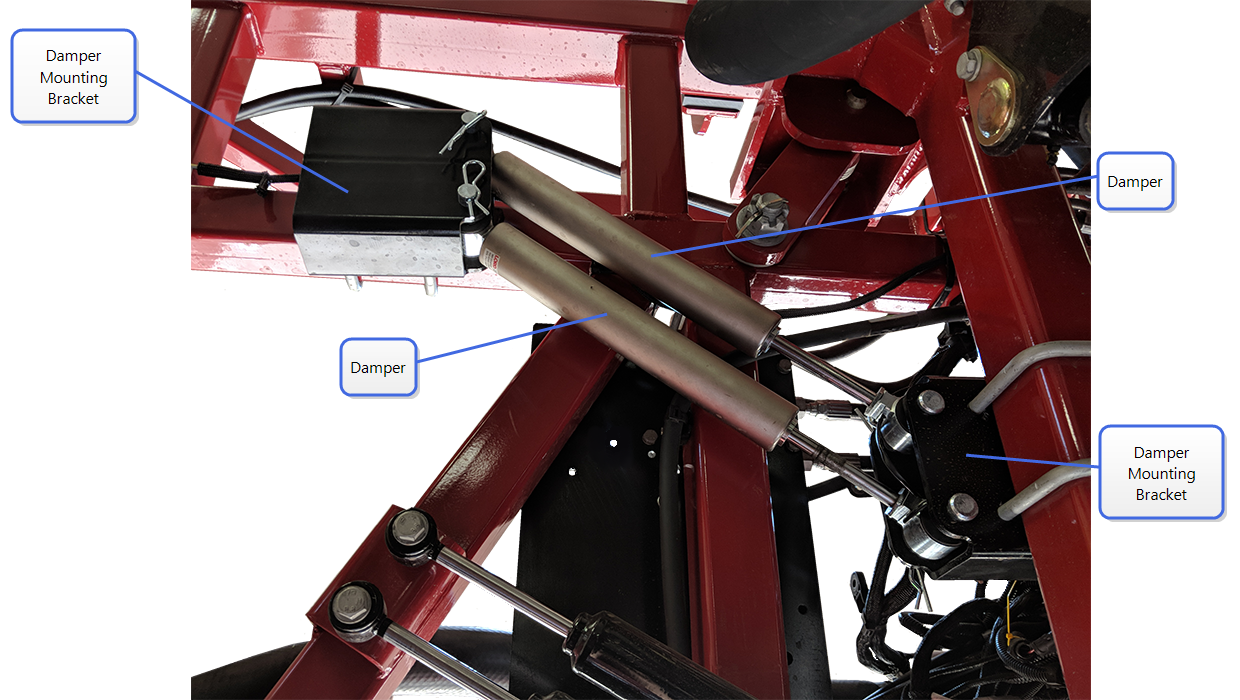
Using the provided 1/2” - 13 U-bolts, loosely install one of the damper mounting brackets to the front of the center rack cross tube with the two holes facing towards the centerline of the machine.

-
Using the provided U-bolts, loosely install the other damper mounting bracket to the back of the center frame vertical tube with the two holes facing towards the outside.
-
Using the provided 5/8” clevis pins, install the damper spacing templates (P/N 107-0235-029) to both holes on each of the mounting brackets. It may be necessary to slide the brackets to install the template.
Note: The bracket installed on the vertical member should be as low as possible. Slide the upper bracket to work with the lower bracket as low as possible.
-
Adjust the brackets so they are level to the machine.
-
Tighten the U-bolts to secure the brackets in place.
-
Remove the damper spacing template.
Note: It will be necessary to compress the dampers to fit into the spacing. To do this:
-
connect two ends of a ratchet strap to each other
-
place the ratchet strap around the damper like a belt
-
tighten the ratchet strap until the damper is the desired length
-
-
With the cylinder end of the damper at the top, use the provided 5/8” clevis pins to install the top damper in the top holes on each bracket.
-
Use the provided 5/8” clevis pins to install the bottom damper in the bottom holes in each bracket.
-
Install the cotter pins in the ends of all the 5/8” clevis pins.
Last Revised: Jul 2024