for Patriot/Trident
|
|
|
|---|---|
|
|
The implement or machine must remain stationary and switched off with booms or implement sections unfolded and supported during installation or maintenance. |
|
caution |
|
|---|---|
|
|
When installing hydraulics or performing diagnostics, maintenance, or routine service, ensure precautions are taken to prevent any foreign material from being introduced into the machine hydraulic system. Objects or materials that are able to bypass the machine hydraulic filtration system will reduce performance and possibly cause damage to the hydraulic valve. |
|
notice |
|
|---|---|
|
|
The appearance of the hydraulic valve may vary slightly from the images contained in this manual. However, the fittings, hose connections, and cable connections remain the same. |
-
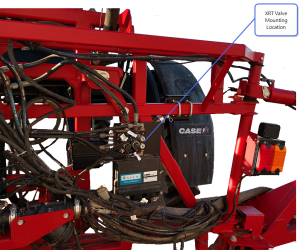
Secure the AutoBoom® XRT valve (P/N 334-0235-001) to the mounting bracket (P/N 107-0235-011) using four
5/16” hex bolts and four 5/16” lock washers.Note: For model year 2020 and newer 132’ and 135’ aluminum booms, the AutoBoom® XRT valve may be mounted to the existing plate where the REM
 Raven Expansion Module ECU
 Electronic Control Unit will be mounted.
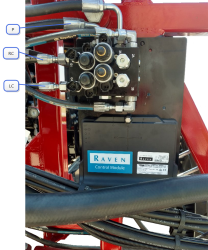
Mount the AutoBoom® XRT valve so that Port P is facing up and LC and RC Ports are facing the center of the machine.
-
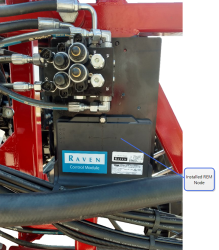
Mount the REM node (P/N 063-0173-965) to the valve mounting bracket using two 1/4”-20 x 3” hex bolts, one 1/4”-20 x 2.5” hex bolt, three washers, and three 1/4” - 20 lock nuts.
Note: Position the node so that the cable connectors will face down.
The REM ECU is installed at the factory on model year 2020 and newer machines with a 132’ and 135’ aluminum boom.
-
Secure the mounting bracket to the machine center rack using two 2-9/16” W x 3-1/2” L x 3/8” thread U-bolts and four 3/8”-16 flange nuts.
Last Revised: Jul 2024
 warning