for RoGator
|
|
|
|---|---|
|
|
The implement or machine must remain stationary and switched off with booms or implement sections unfolded and supported during installation or maintenance. |
 warning
|
caution |
|
|---|---|
|
|
When installing hydraulics or performing diagnostics, maintenance, or routine service, ensure precautions are taken to prevent any foreign material from being introduced into the machine hydraulic system. Objects or materials that are able to bypass the machine hydraulic filtration system will reduce performance and possibly cause damage to the hydraulic valve. |

|
notice |
|
|---|---|
|
|
The appearance of the hydraulic valve may vary slightly from the images contained in this manual. However, the fittings, hose connections, and cable connections remain the same. |

Adjusting Installed Hydraulic Valve
-
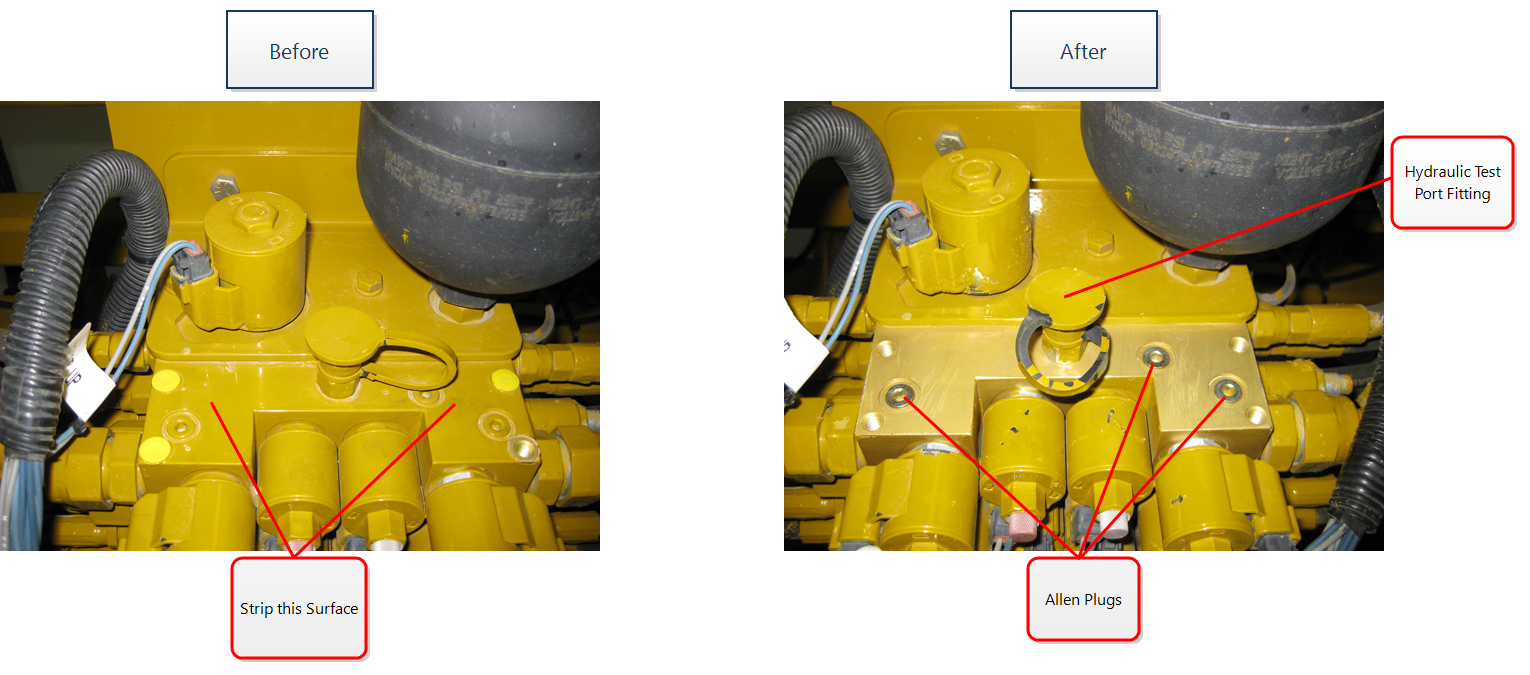
Strip the factory paint from the top of the existing hydraulic valve using a chemical approved for paint removal.
Note: Do not scrape the paint from the hydraulic valve. Scraping the paint may cause damage to the valve.
-
Remove the hydraulic test port fitting and Allen plugs from the existing hydraulic valve.
Note: The test port fitting will be installed on the AutoBoom® XRT hydraulic valve later in the procedure. Protect the test port fitting from dust and debris to avoid contamination of the hydraulic system.
-
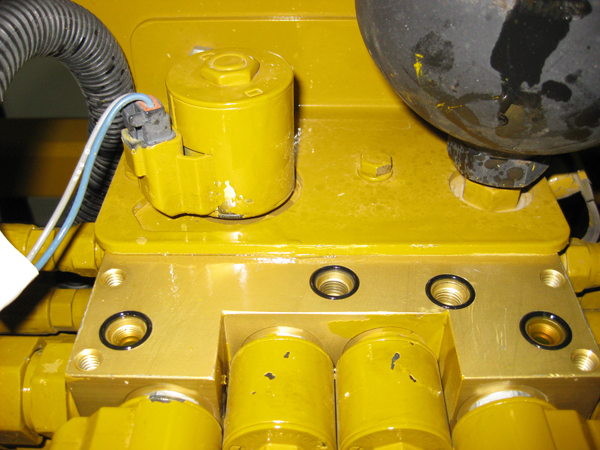
Clean any remaining paint from the existing hydraulic valve, taking care to prevent paint chips from entering the open hydraulic ports.
-
Install 9/16” ID Buna-N O-rings (P/N 219-0001-015) in the open ports of the hydraulic valve.
Note: Use grease or petroleum jelly to hold the O-rings in place during the AutoBoom® XRT valve installation, taking care to avoid contamination of the inside of the open ports.
-
Blow the hydraulic port threads of any excess oil.
-
Clean excess oil, grease, and debris from the top of the hydraulic valve.
-
Clean excess hydraulic fluid from the AutoBoom® XRT valve (P/N 334-0235-004).
-
Install the supplied hex bolts in the AutoBoom® XRT valve, placing the shorter bolt in the cut-out section of the AutoBoom® XRT valve.
Installation for Machines with Existing Hydraulic Valve
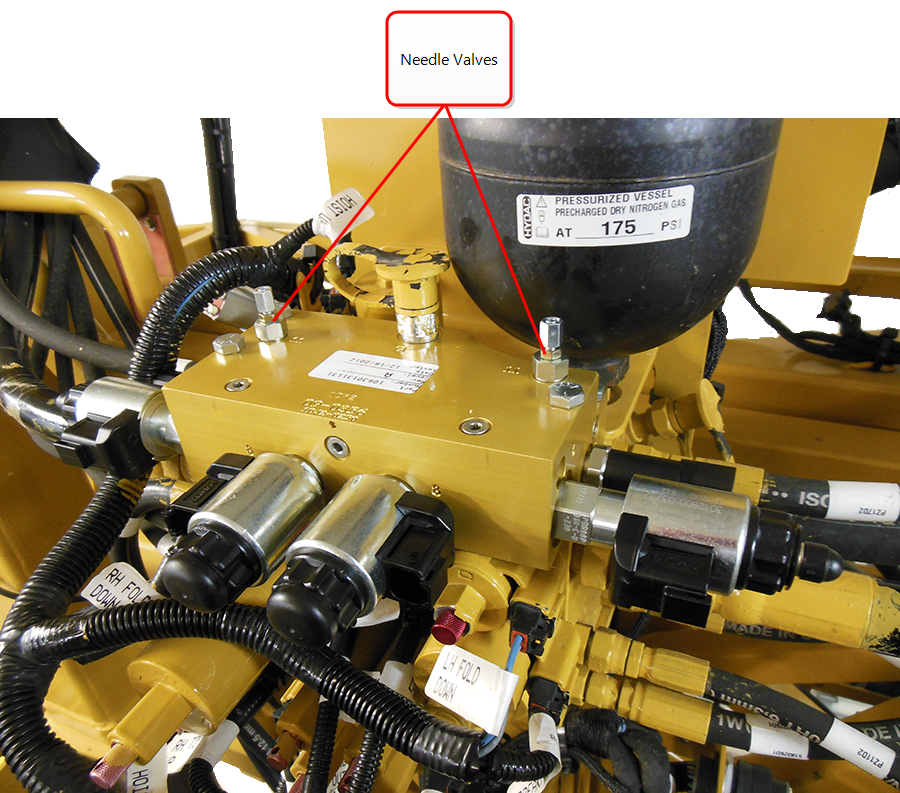
On machines with existing AutoBoom® XRT valves, back the existing needle valves out completely then tighten the jam nut.
-
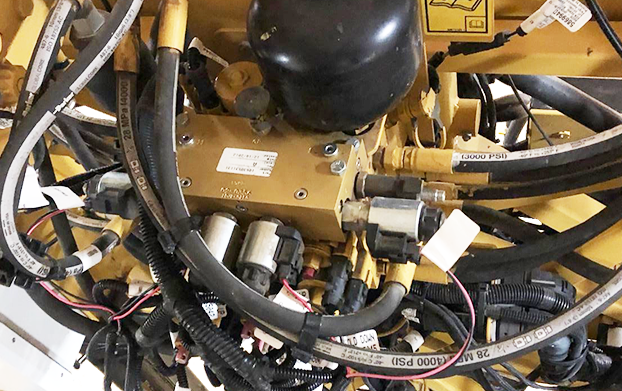
Carefully place the AutoBoom® XRT valve on the existing hydraulic valve, positioning it so that the cut-out section faces the accumulator.
-
Alternately tighten each bolt a small amount to a maximum of 15-20 ft. lbs. per bolt.
-
Install the hydraulic test fitting in Port GP of the AutoBoom® XRT valve.
Last Revised: Jul 2024