for TerraGator C
|
|
|
|---|---|
|
|
The implement or machine must remain stationary and switched off with booms or implement sections unfolded and supported during installation or maintenance. |
 warning
Note: It will be necessary to purchase springs from your AGCO dealer if the machine is not already equipped with centering springs on the center rack.
| AGCO Part Number | Quantity | Description |
|---|---|---|
| 601102D1 | 2 | Threaded Rod |
| AG517248 | 2 | End Rod |
| SN1040 | 6 | Lockwasher 3/4” |
| 375100X1 | 6 | Hex Nut 3/4”-10 SAE 5 ZN |
| AG561156 | 2 | Flat Washer 3/4” |
| 7701329 | 2 | Hex Cap Screw 3/4”-10 x 2-1/4” GR5 |
| AG562291 | 6 | Hex Nut 3/4”-16 |
| AG108604 | 2 | Spring |
-
Unfold the booms and remove the rubber bumpers that limit center rack rotation.
-
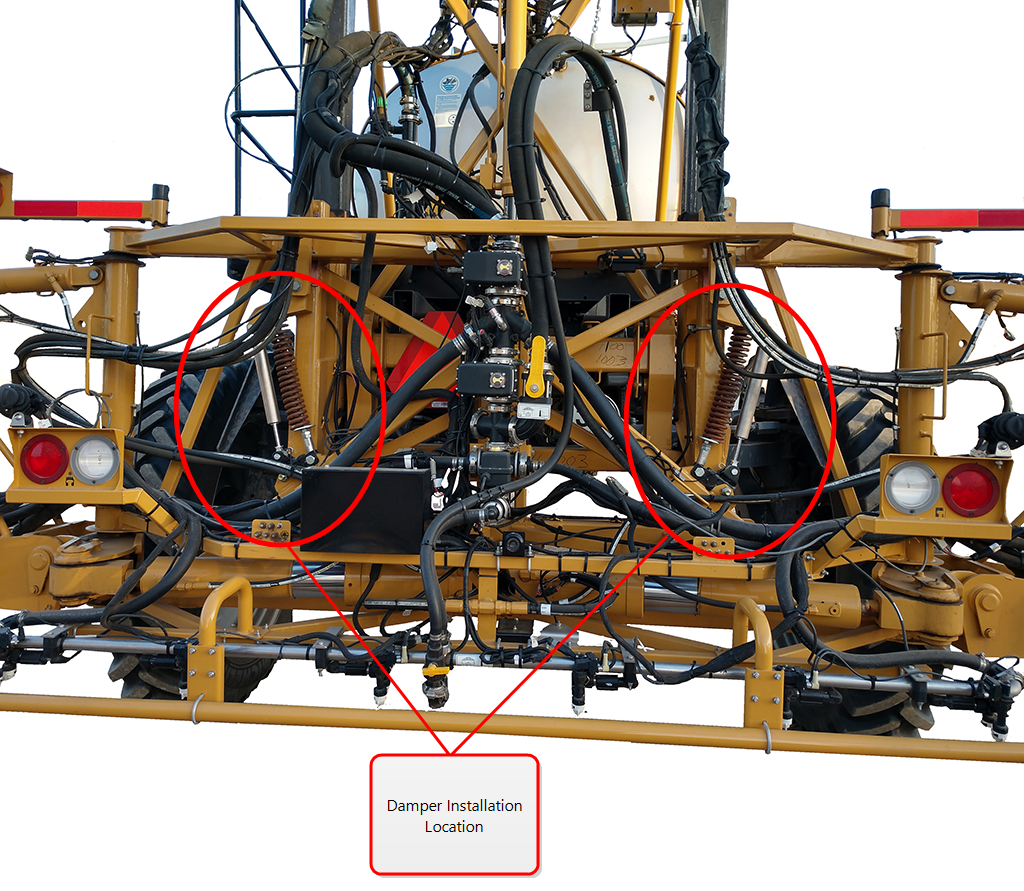
Identify the damper installation location.
-
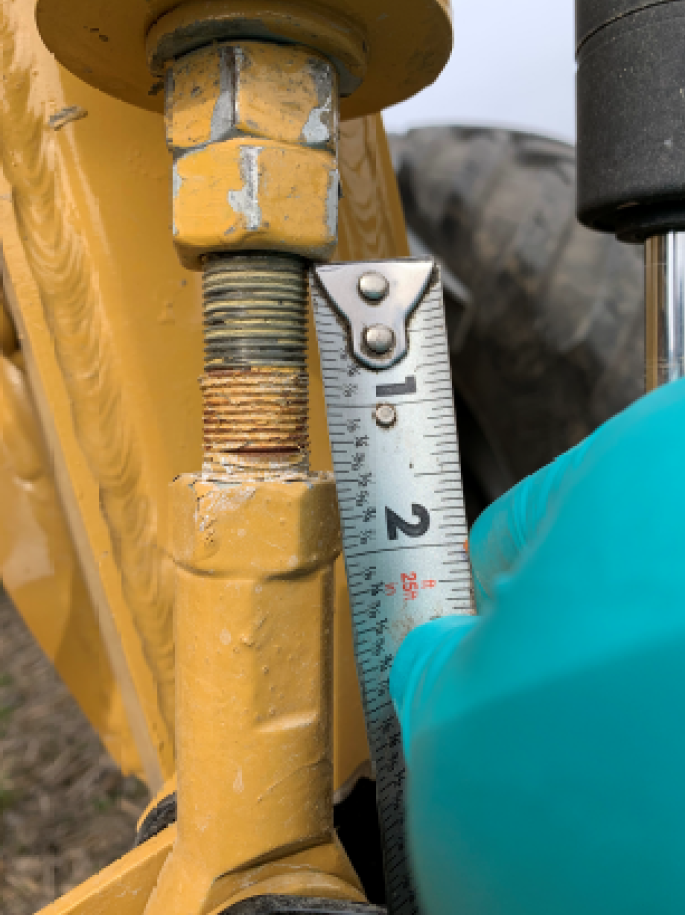
Measure and record the distance of thread showing between jam nuts and eye swivel on spring assembly.
Note: This distance will be needed when reinstalling the spring assemblies.
-
Loosen nuts on the threaded rod holding the spring to remove as much tension as possible.
Note: Ensure not to re-tighten the spring after installation.
-
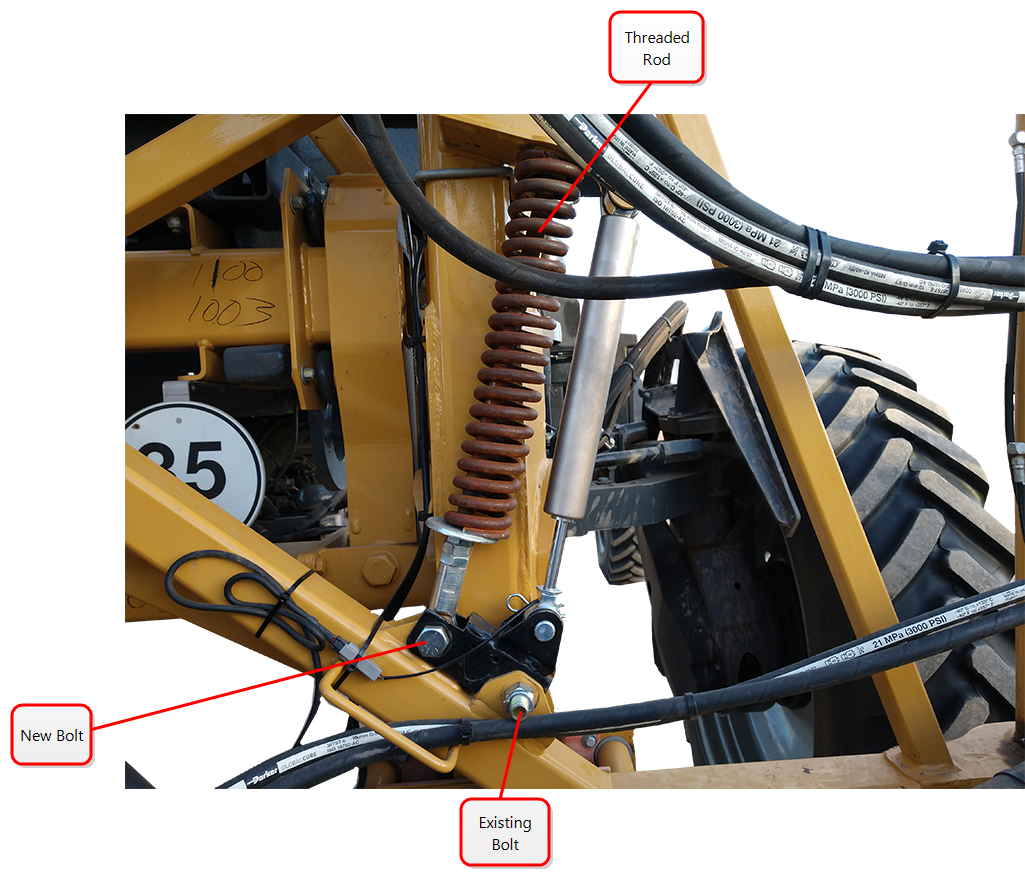
Remove the 3/4”-10 bolt and nut holding the threaded rod and spring and remove from the machine.
-
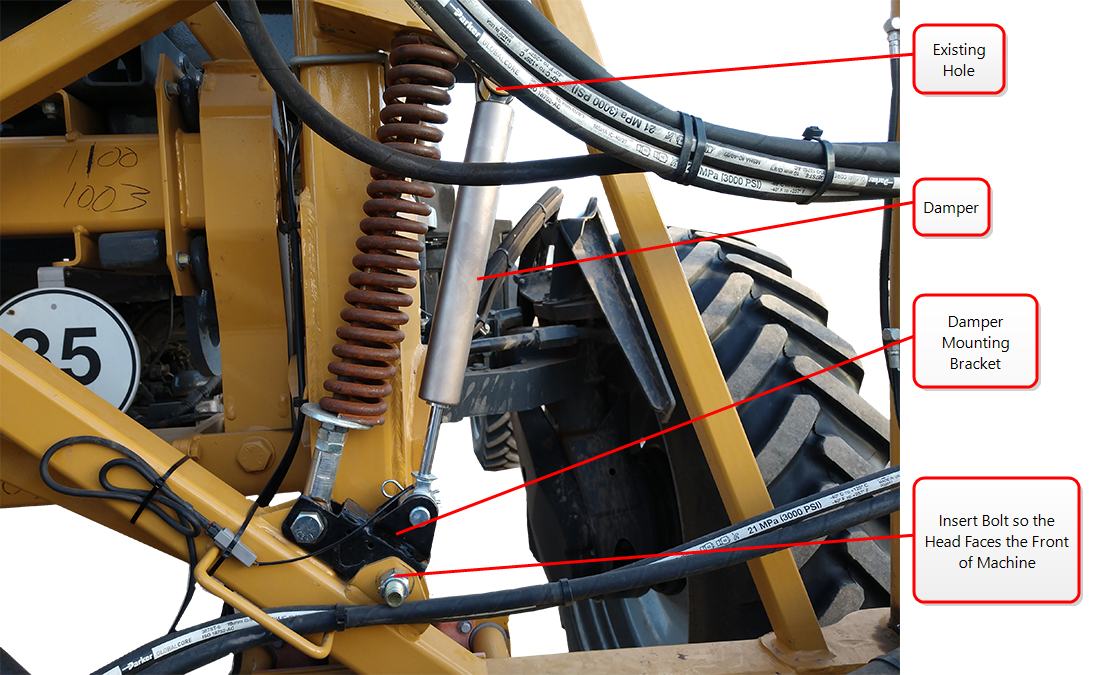
Install the damper mounting bracket in the location where the 3/4”-10 bolt was removed.
-
Reinstall the 3/4”-10 bolt and nut with the bolt head facing the front of the machine.
Note: It may be necessary to rotate the boom to ease mounting location access.
-
Install the threaded rod and spring back onto the center rack using the removed hardware. Do not tighten the spring.
Note: It will be necessary to compress the dampers to fit into the spacing. To do this:
-
connect two ends of a ratchet strap to each other.
-
place the ratchet strap around the ends of the damper like a belt.
-
tighten the ratchet strap until the damper is the desired length.
-
-
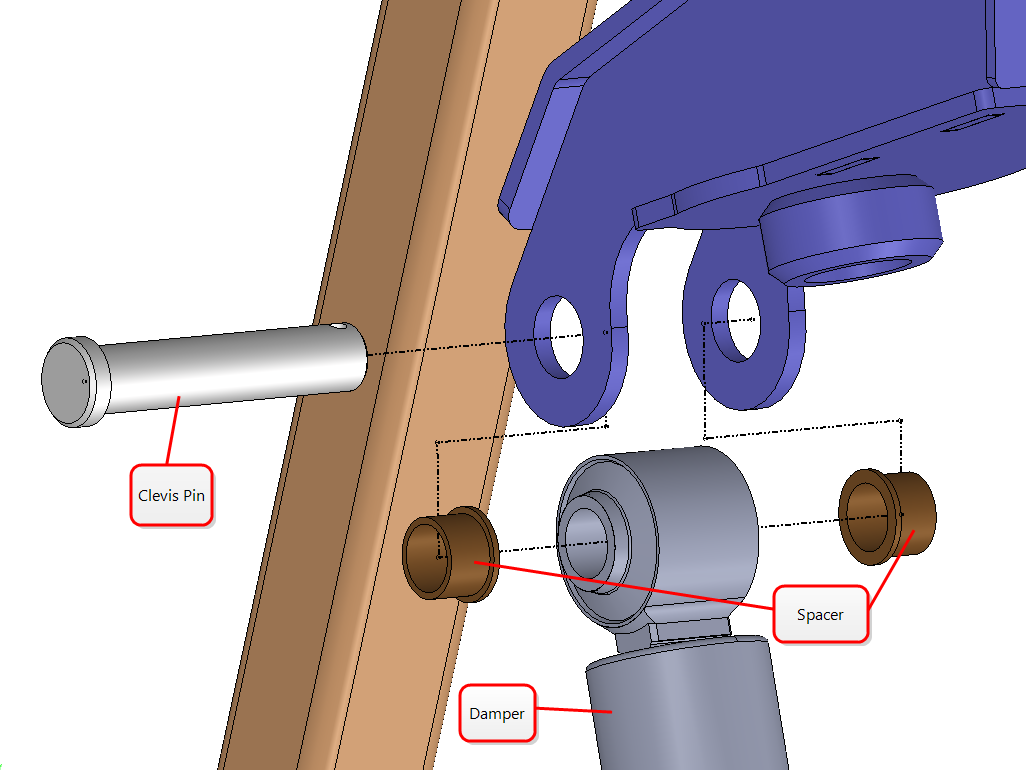
With the rod end of the damper at the bottom, use the provided shorter 5/8” clevis pins and spacers to install the damper in the bottom holes on each bracket.
Note: Bushings may need to be tapped into the holes if the paint is too thick.
-
Use the provided longer 5/8” clevis pin and R-clip to install the base end of the damper in the hole in the upper bracket.
Note: The rack may need to be rotated to ease placing pins in the access holes.
-
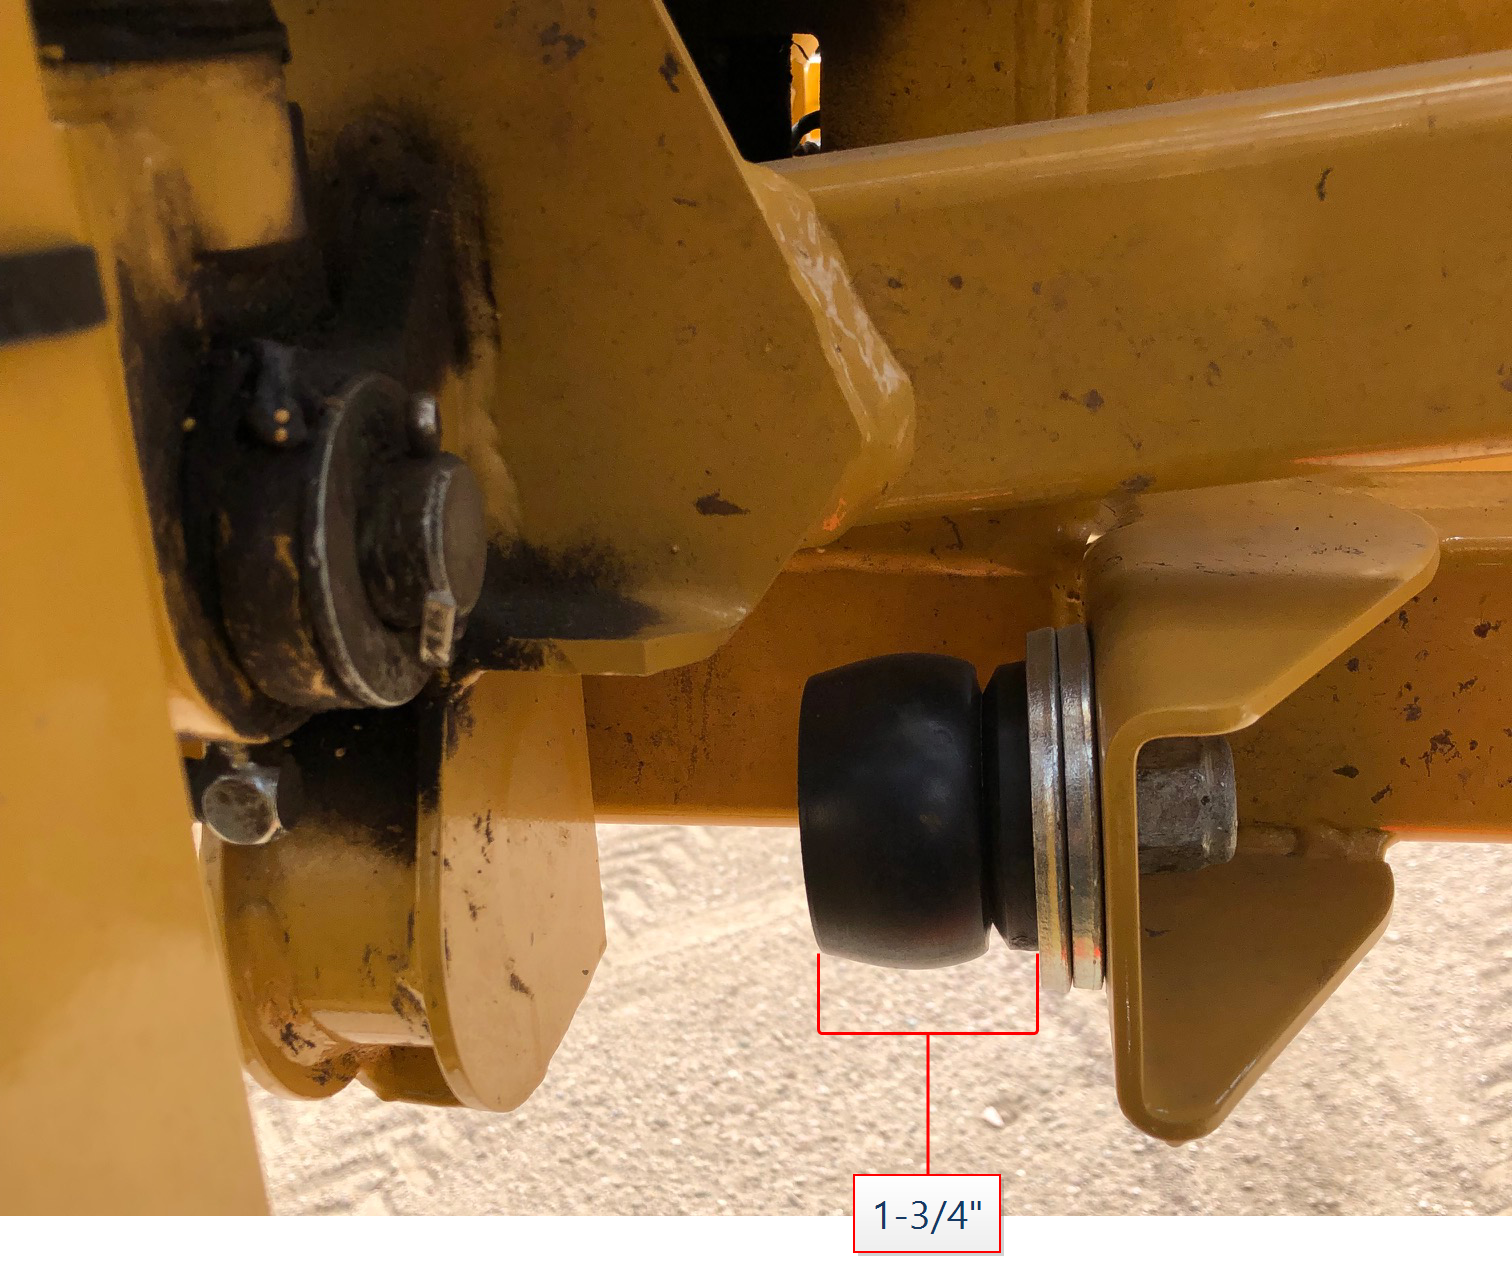
Reinstall the rubber bumpers on the center rack.
Note: Bumper may be 3-1/2” or 1-3/4”. If the bumper measures 1-3/4”, install two 3” fender washers onto the back of the bumper and use the provided countersunk bolt to secure in place.
-
Tighten jam nuts on spring assembly to a distance of 1.5in [3.81cm] between nuts.
Last Revised: Jul 2024