Setup the Tractor Vehicle Navigation
-
Press the Raven Cart Automation™ tab at the bottom of the screen.
-
Select the Vehicle Navigation tab.
-
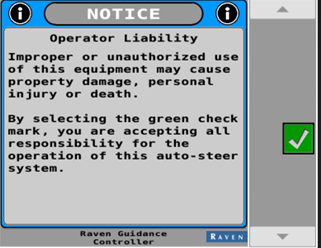
Press the Green Check Mark to accept the Operator Liability Notice.
Note: The system will not work if this step is not completed.
-
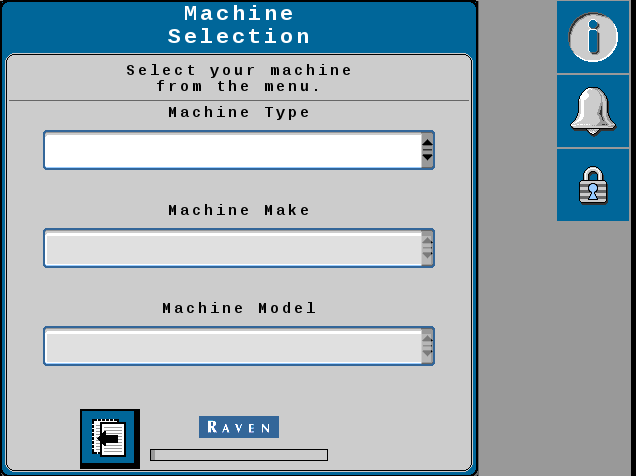
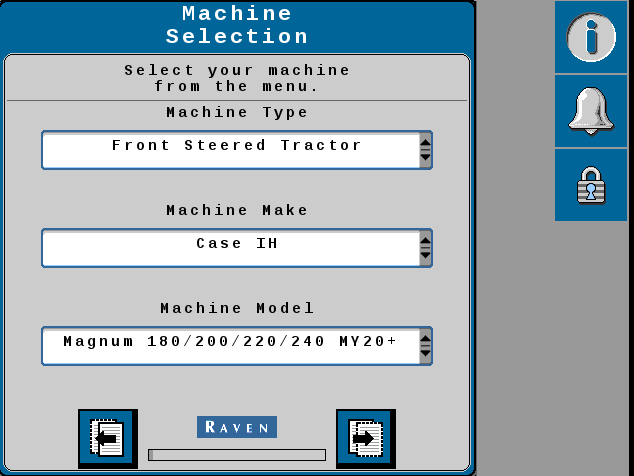
Select the correct tractor information.
-
Make sure to use model year 2020 and greater model numbers.
Note: If the machine model is selected the dimensions for vehicle navigation will be pre-populated. Verify that all dimensions are correct.
-
Set the Navigation System:
-
Automation Level - Drive Assist
-
Guidance Mode - Follower Mode

-
-
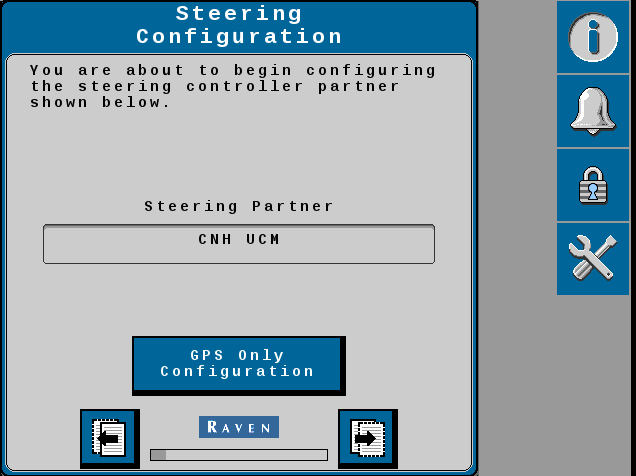
Verify that CNH UCM is set as the Steering Partner.
-
Press the Next button.
-
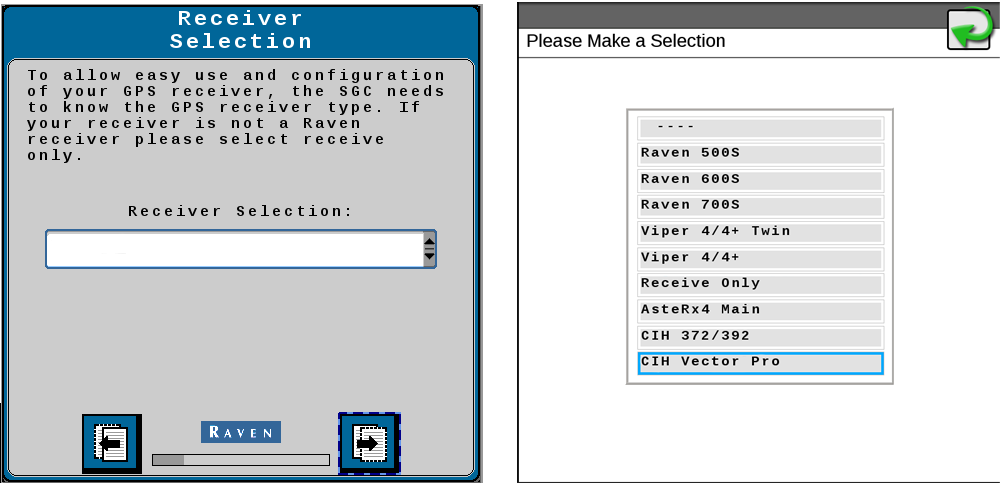
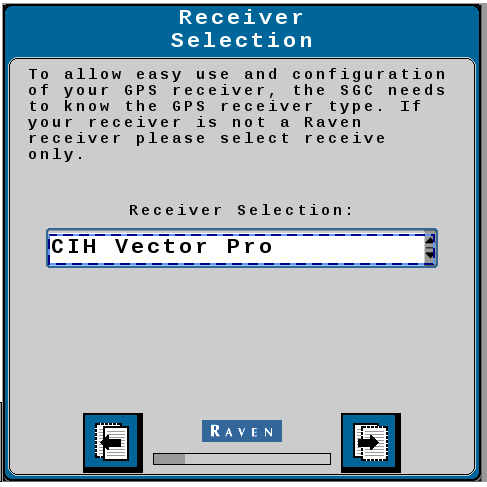
Set the Receiver Selection to the GPS receiver installed on the machine.
Note: Do not use Receive Only.
-
Press the Next button.
-
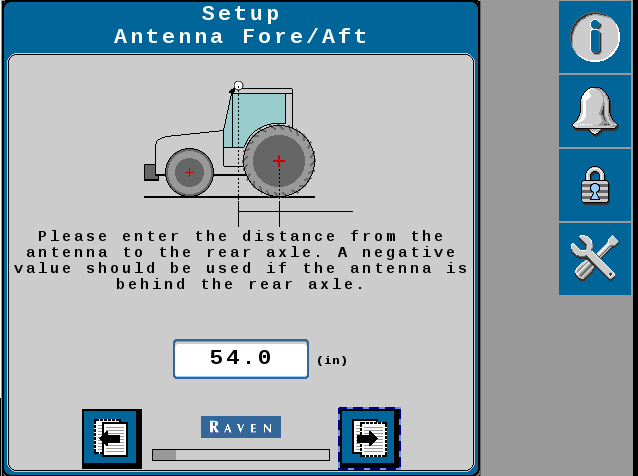
Set the Antenna Fore / Aft dimensions.
-
Press the Next button.
-
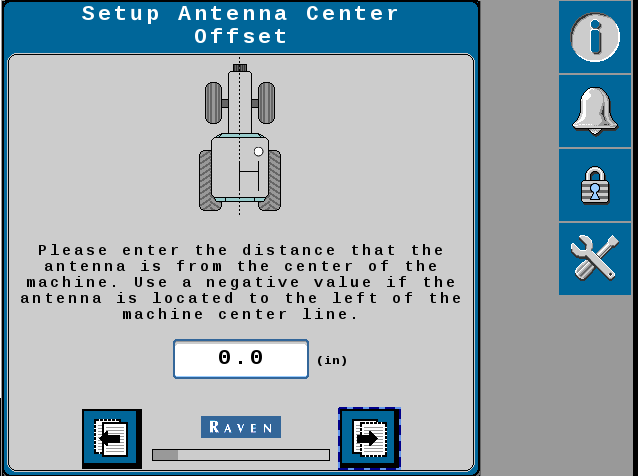
Set the Antenna Center Offset dimension.
-
Press the Next button.
-
Set the Antenna Height dimension.
-
Press the Next button.

-
Set the Wheel Base dimension.
-
Press the Next button.

-
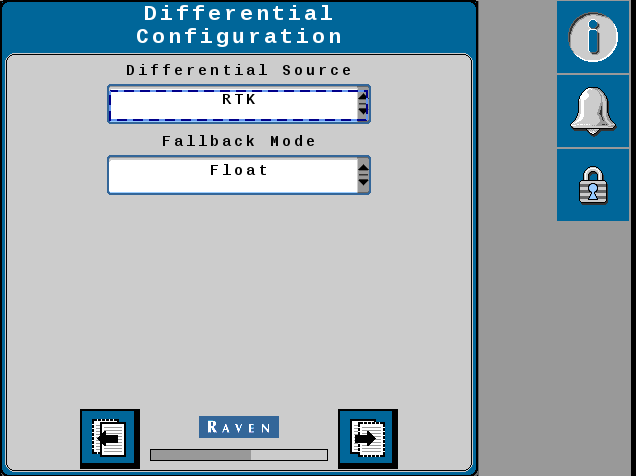
Set the Differential
 Differential Global Positioning System is an enhancement to standard GNSS/GPS messages to provide better position accuracy. Source and Fallback Mode based on the GPS source being used.
Differential Source FallBack Mode RTK Real-time Kinematic
Float L-Band Float Note: RTK is used for RTK or RTK+ corrections.
L-Band is used for AFS / PLM 3 and CenterPoint RTX corrections.
-
Press the Next button.
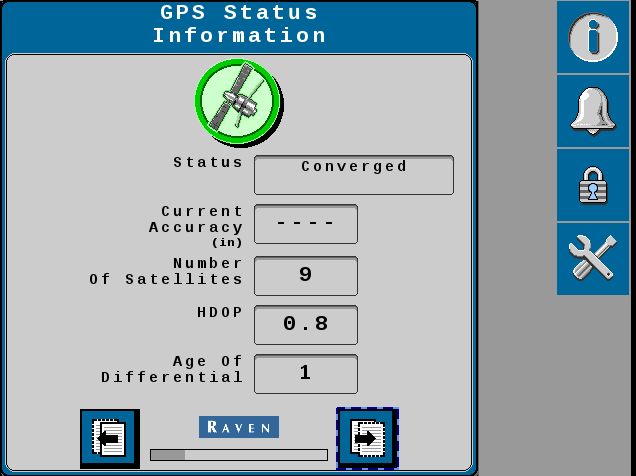
Note: The RTK correction source is not working correctly if the GPS status does not display green. It may take several minutes to converge the RTK correction type.
-
Wait for the GPS Status to change to Converged.
-
Press the Next button.
-
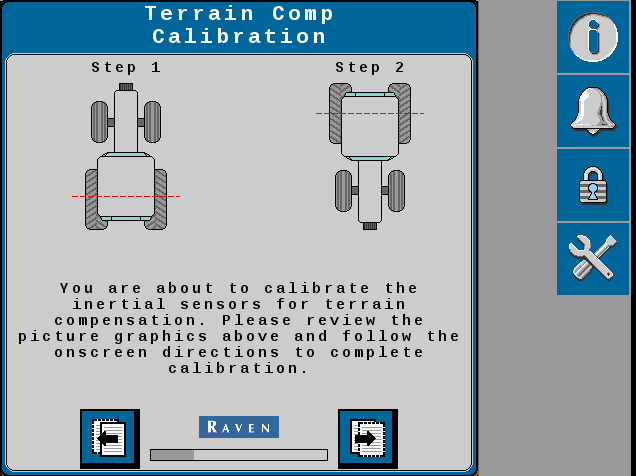
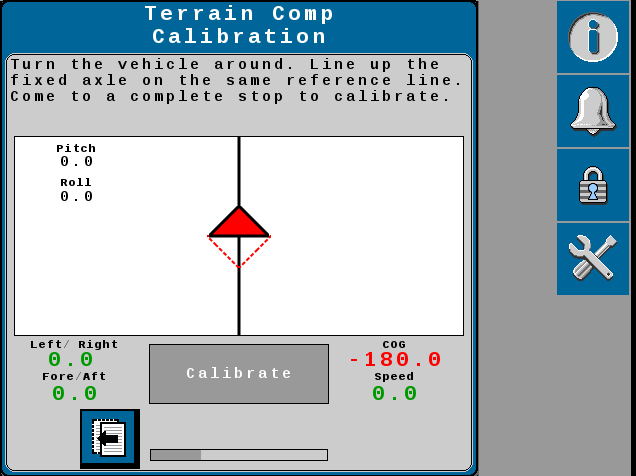
Perform the Terrain Compensation Calibration.
-
Press the Next button.
-
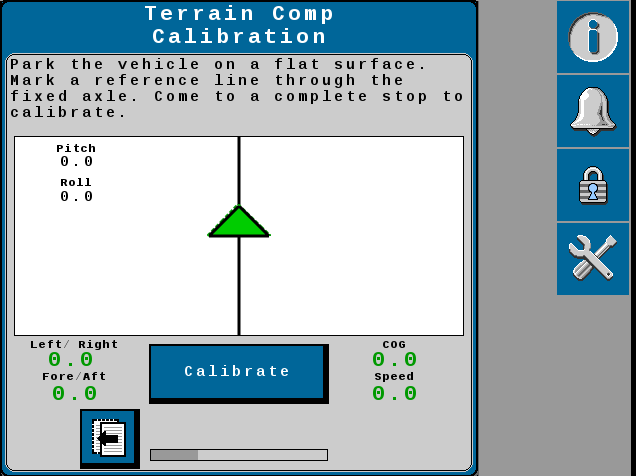
Press the Calibrate button and follow the on screen instructions.
-
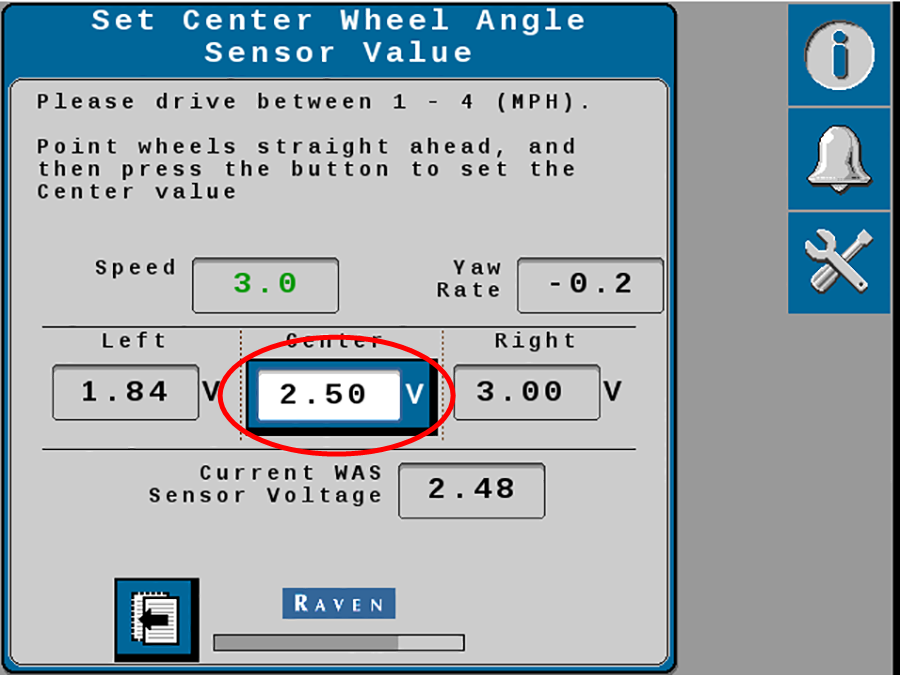
Drive forward between 1.6 - 6.4 km/h [1 - 4 mph]
-
Turn the steering wheel all the way to the left steering lock.
-
Press the Left button to set the left WAS value.
Note: Do not turn the steering wheel until the WAS page advances to the Center WAS setting.

-
Drive forward between 1.6 - 6.4 km/h [1 - 4 mph] with the machine wheels pointing straight ahead.
-
Press the Center button to set the center WAS value.
Note: Do not turn the steering wheel until the WAS page advances to the Right WAS setting.
-
Drive forward between 1.6 - 6.4 km/h [1 - 4 mph].
-
Turn the steering wheel all the way to the right steering lock.
-
Press the Right button to set the right WAS value.

-
Review the WAS calibration information.
Note: Do not turn the steering wheel until the following Calibration Complete page is displayed.
-
Press the Next arrow.

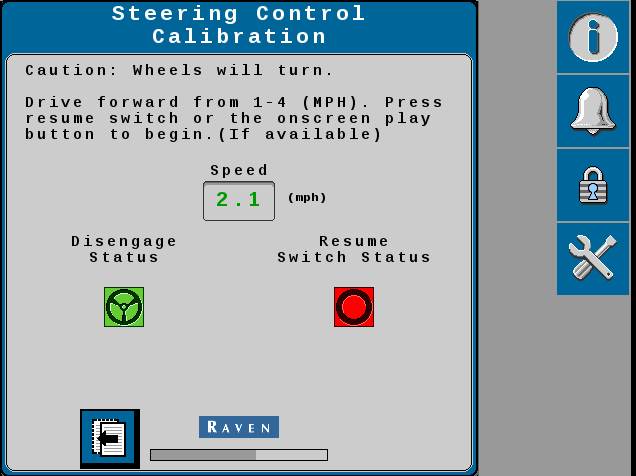
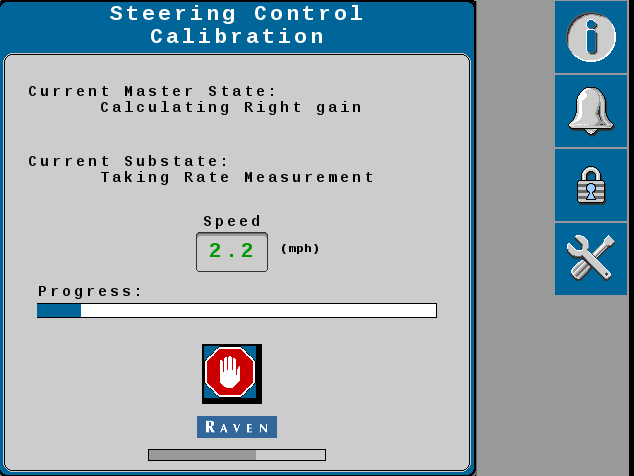
Calibrate the Machine Steering System
The steering control calibration process allows the system to learn the hydraulic capabilities of the machine for optimal steering performance in the field.
Note: During calibration, the machine will make several hard left and right turns. Adjust the vehicle speed and location as necessary.
|
|
|
|---|---|
|
|
The machine will steer automatically. Be sure the area around the vehicle is clear of people and obstacles before engaging the auto-steer system. To disengage auto-steering at any time, turn the steering wheel or select the on-screen Stop button. |
 warning
-
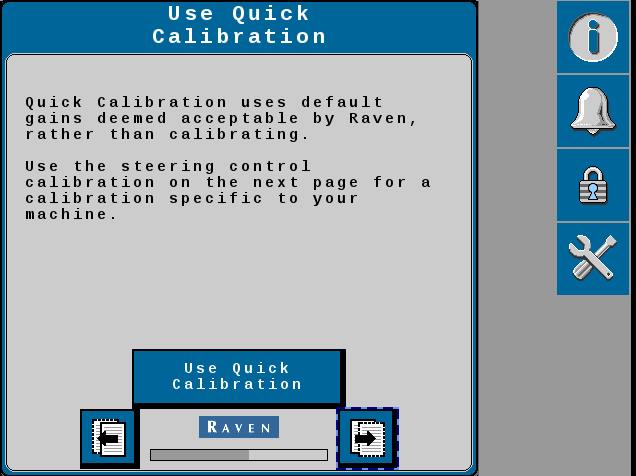
Do not use the quick calibration to calibrate the steering system.
-
Press the Next button.
-
Begin driving forward at a speed between 1.6 and 6.4 km/h [1 and 4 mph].
-
Press the resume switch or use the on-screen arrow to begin calibration.
-
The following information is displayed during the calibration process:
-
Allow the auto-steer calibration to complete. Once complete, select the Next page button to proceed.
-
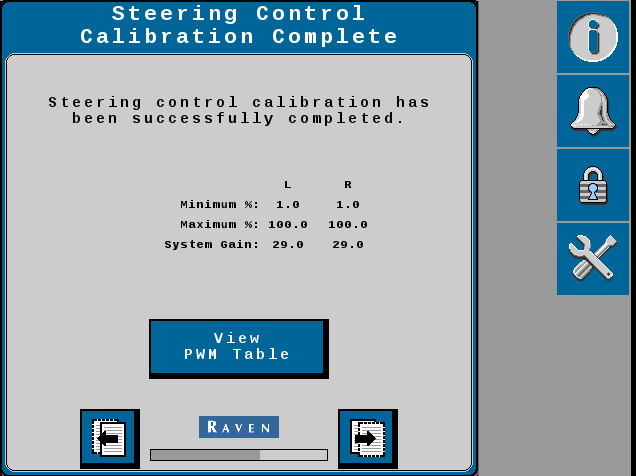
Review the steering effort information shown on the page. Select the Next page button to proceed.
-
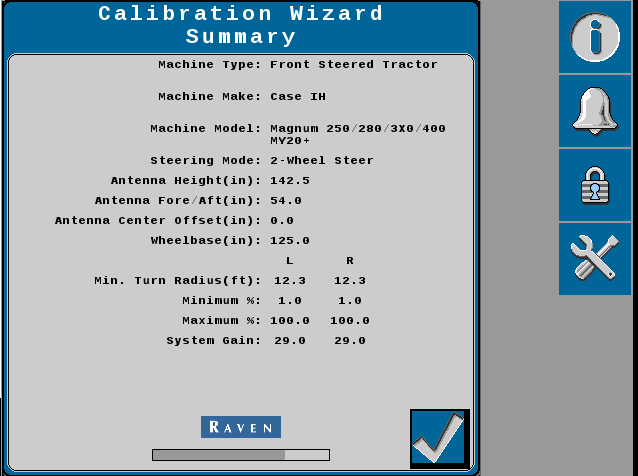
Review the information presented on the Calibration Wizard Summary page.
Last Revised: Sep 2024