Install the Camera System
|
|
|
|---|---|
|
|
Use caution while working on the cab roof or standing on exterior surfaces. Surfaces may be uneven or slippery and hardware or harnesses may present tripping hazards. Contact a local equipment dealer for additional information or assistance with working on the roof or from an elevated position on a specific make and model machine. |
 warning
- Metric socket set - 5 to 24 mm
- Metric Allen wrenches - up to 8 mm
Connect Cameras to the Perception Controller
- Use the provided labels to mark both ends of each camera cable as follows:
- Place labels for Camera 1, 2, and 5 on the 15 ft. [4.5 m] camera cables (P/N 115-2610-105).
- Place labels for Camera 3 and 4 on the 10 ft. [3 m] camera cables (P/N 115-2610-106).
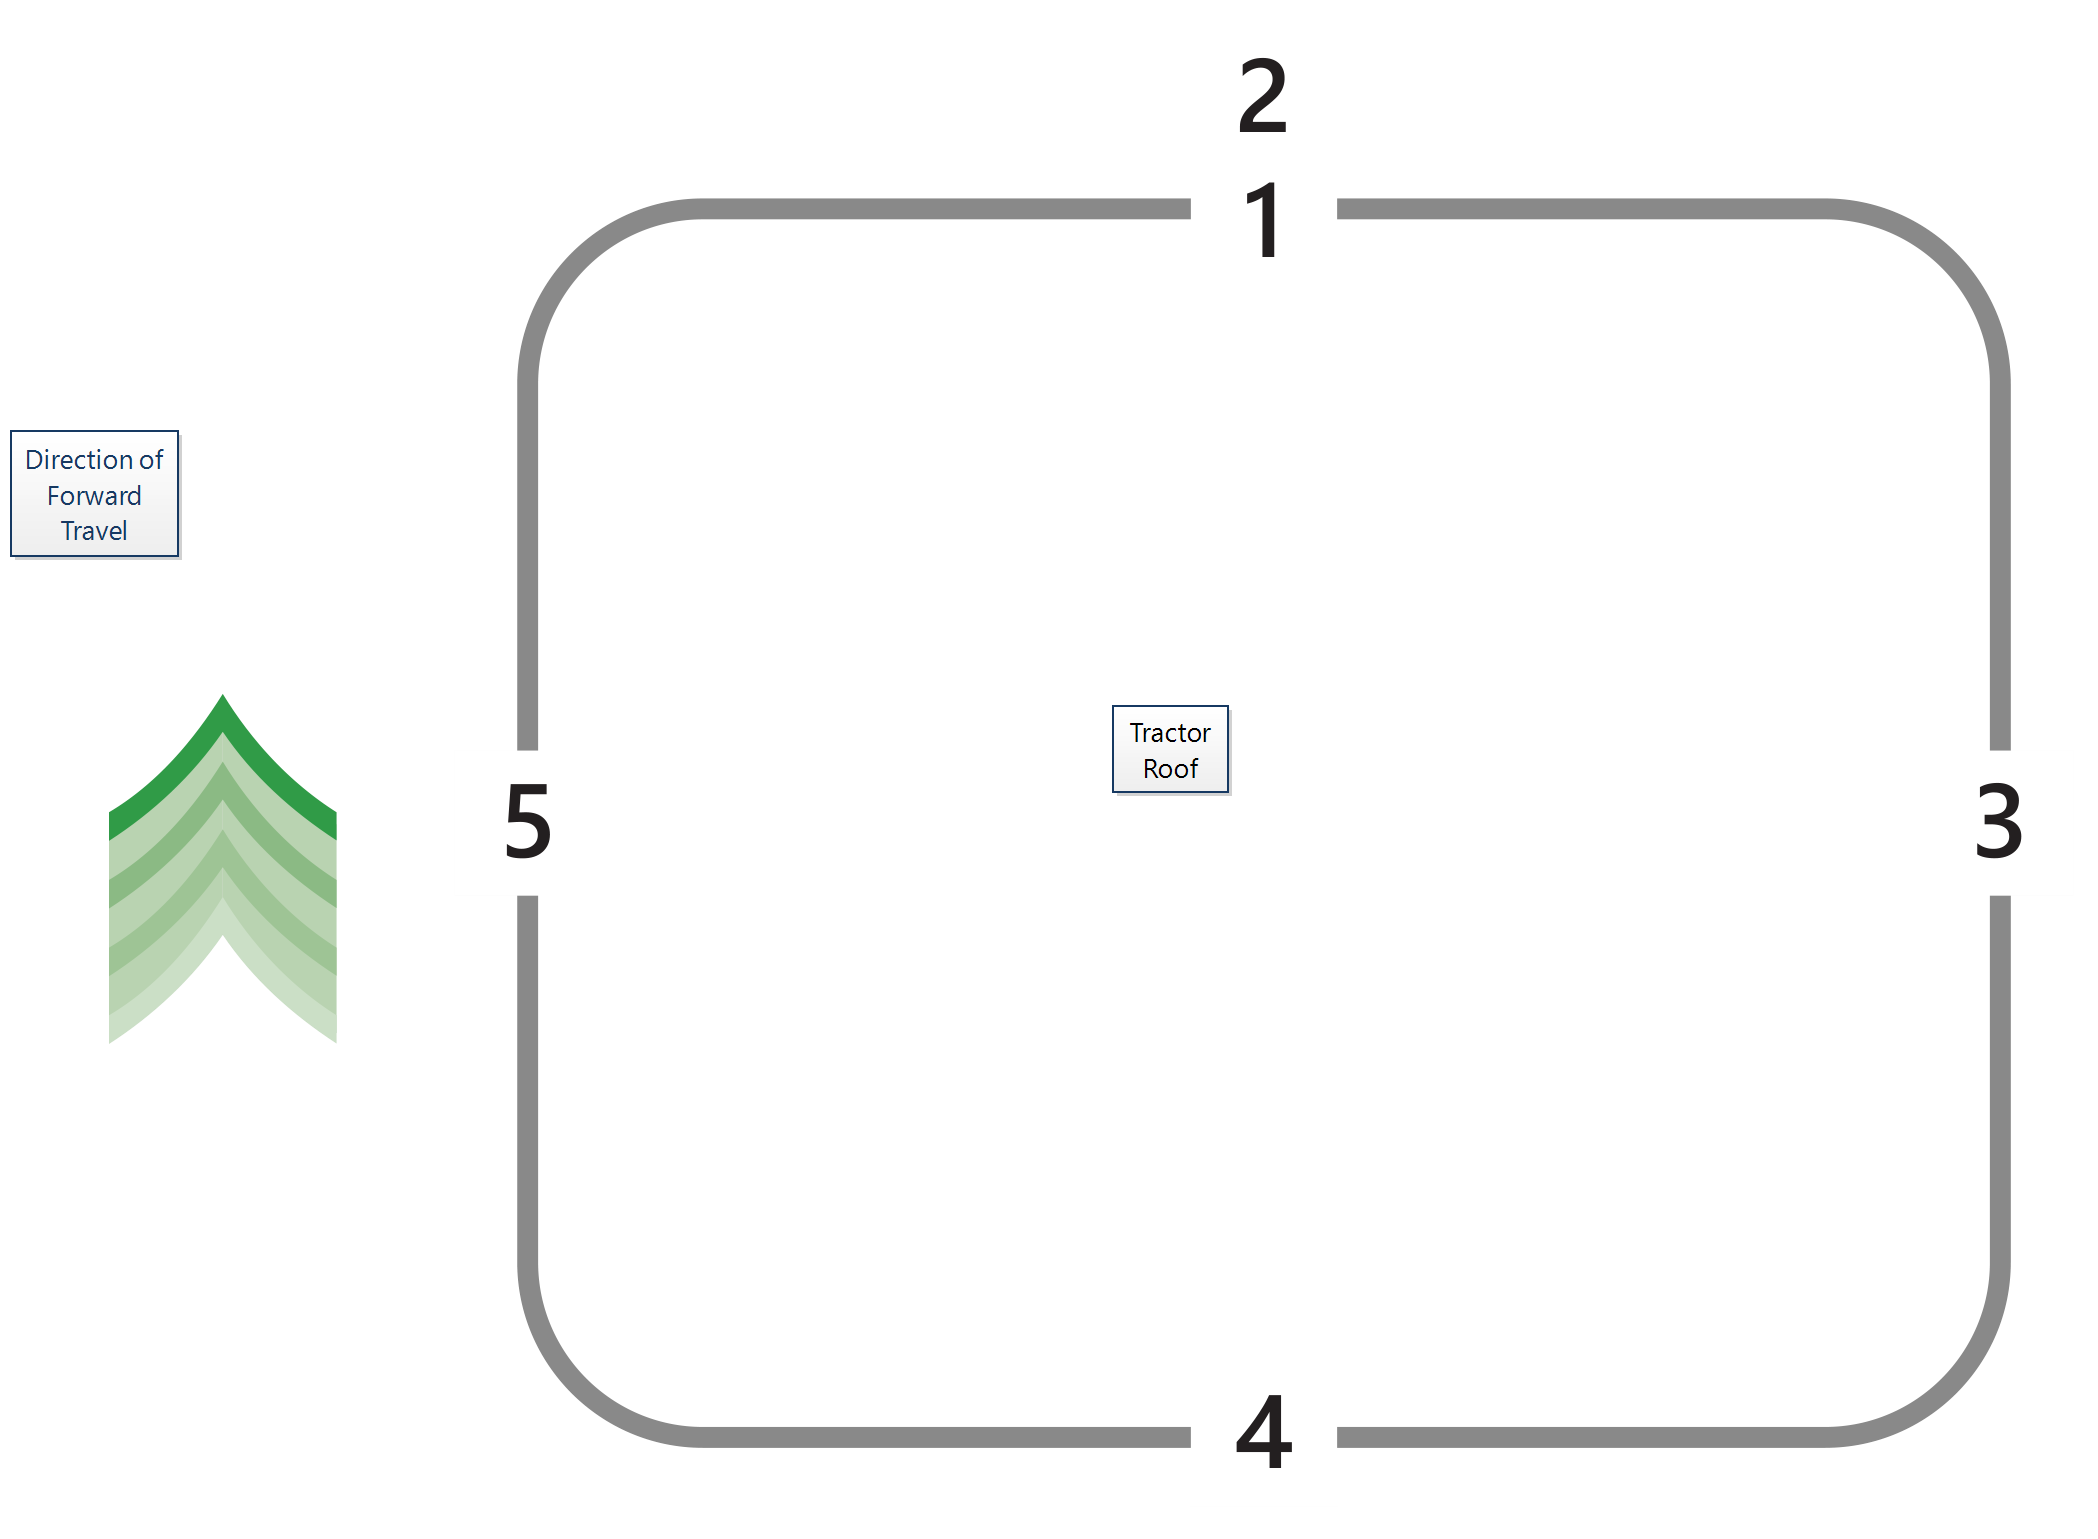
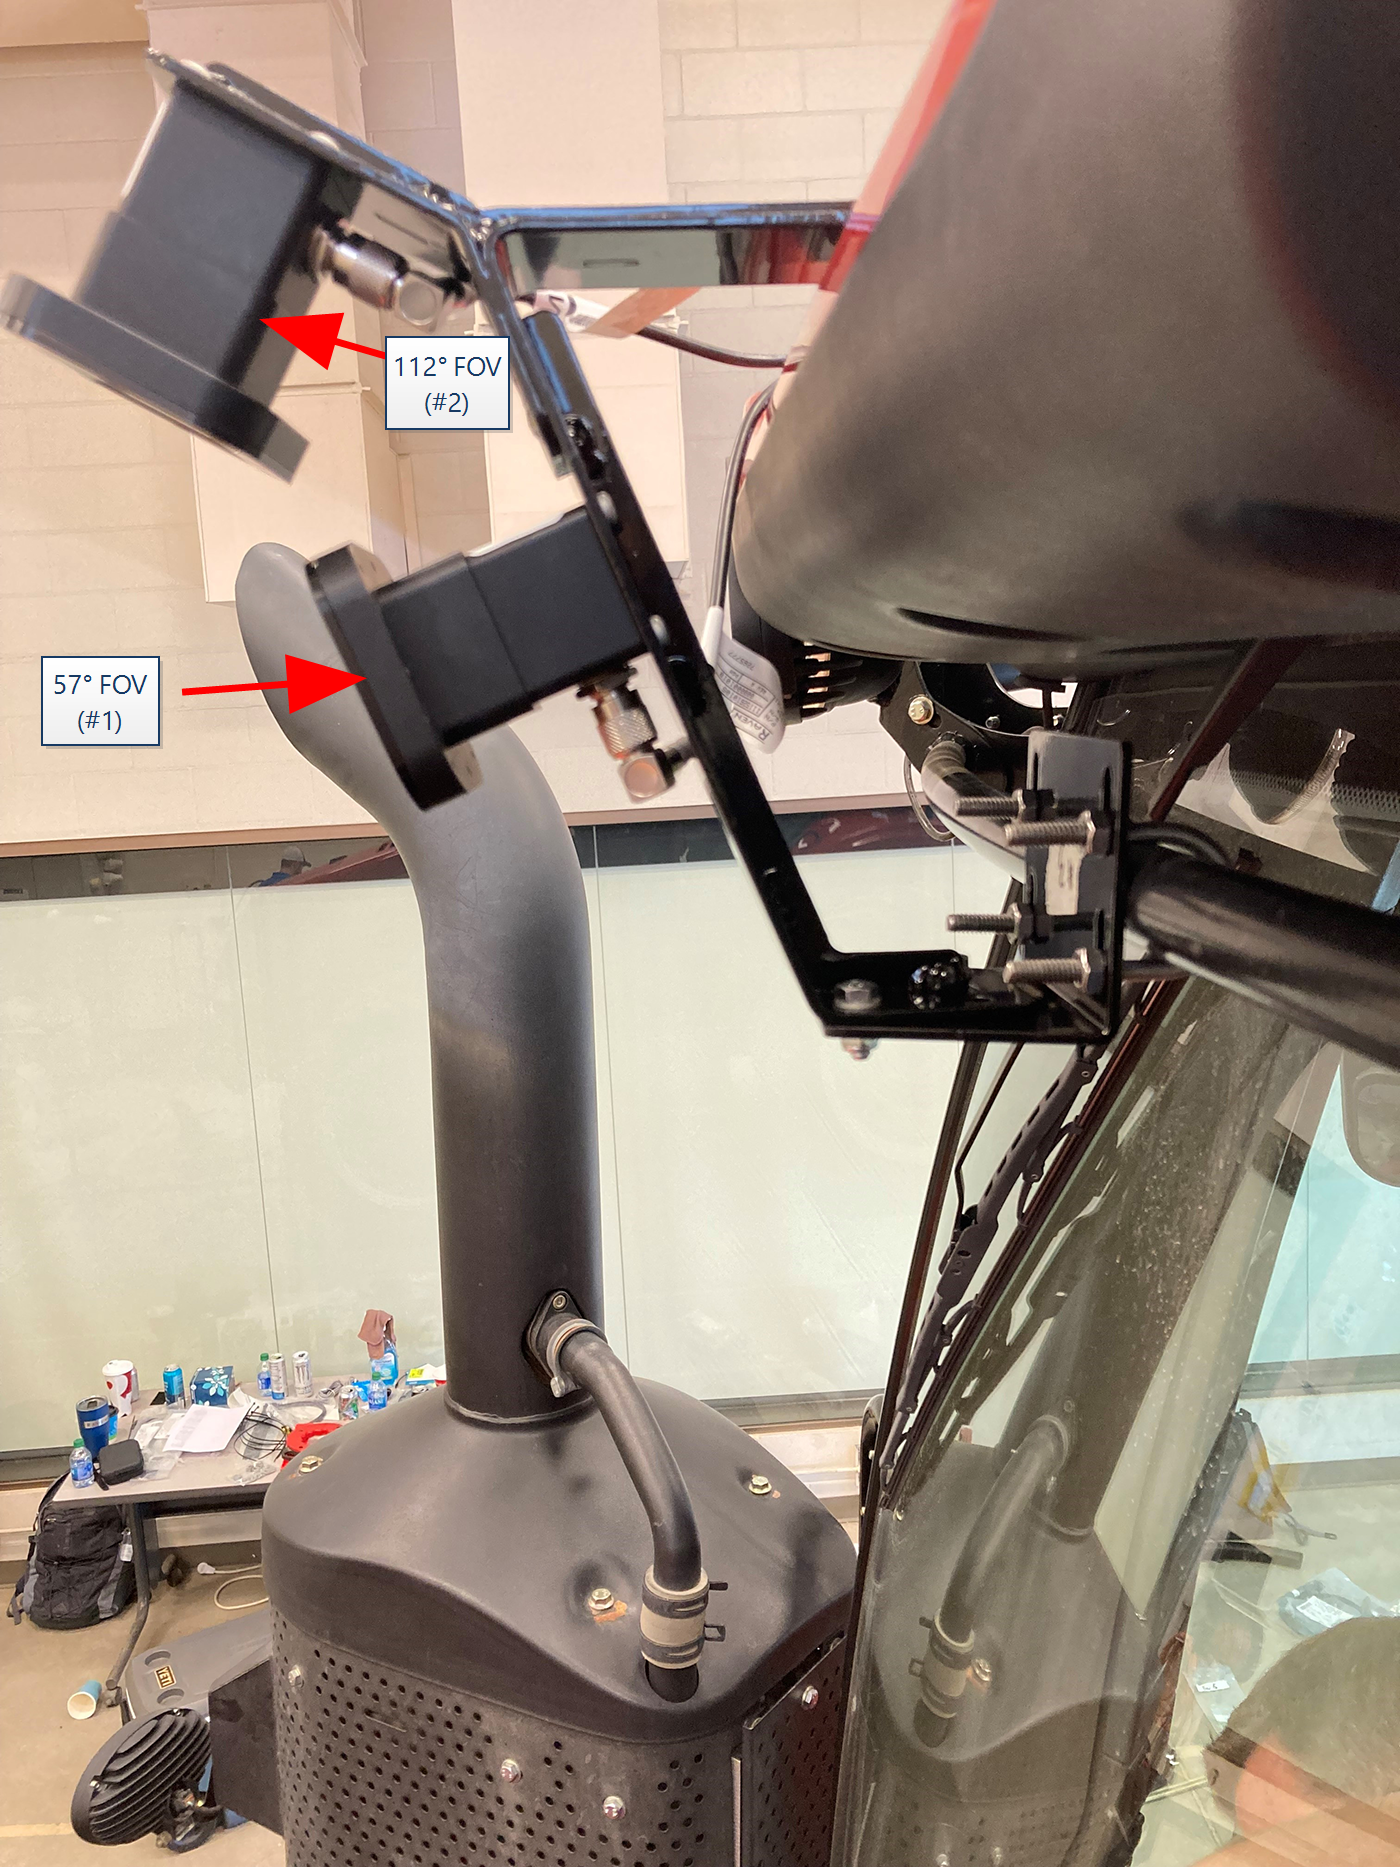
- Connect the labeled camera cables to each of the cameras as shown in the figure below.
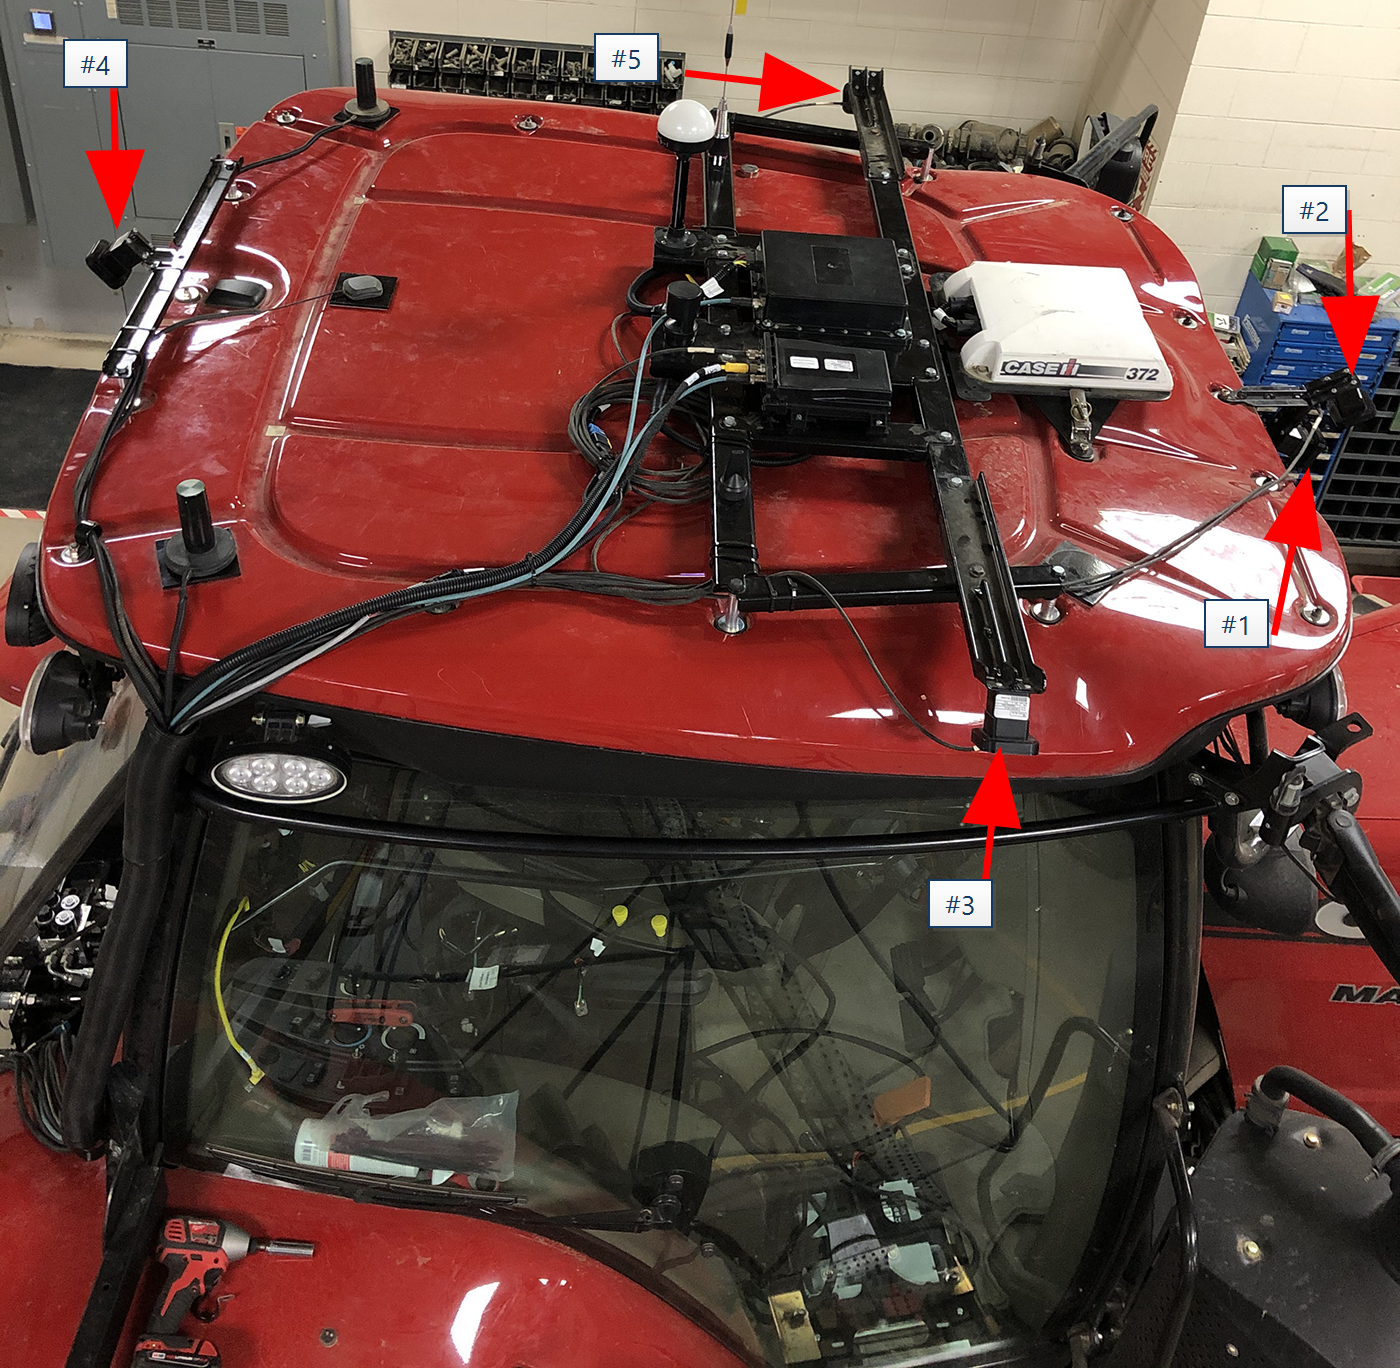
- Route the camera cables to the right, rear corner of the roof and down the post to the grommet located in the lower, right corner of the rear cab window.
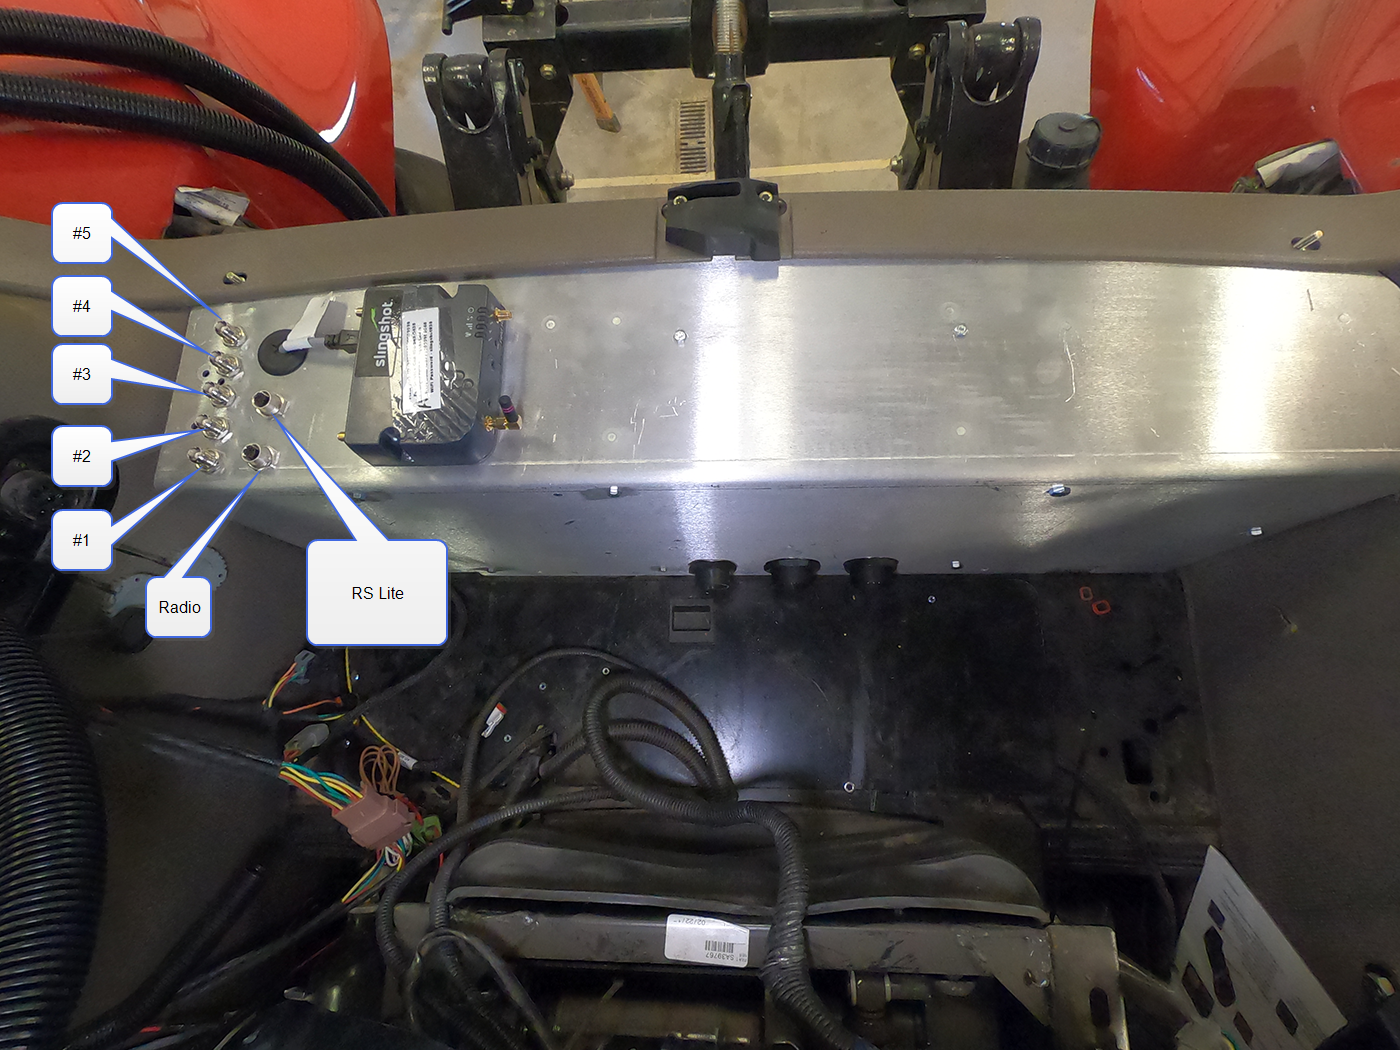
- Route the camera cables to the device plate and connect the numbered camera bulkhead connectors as shown in the image below.
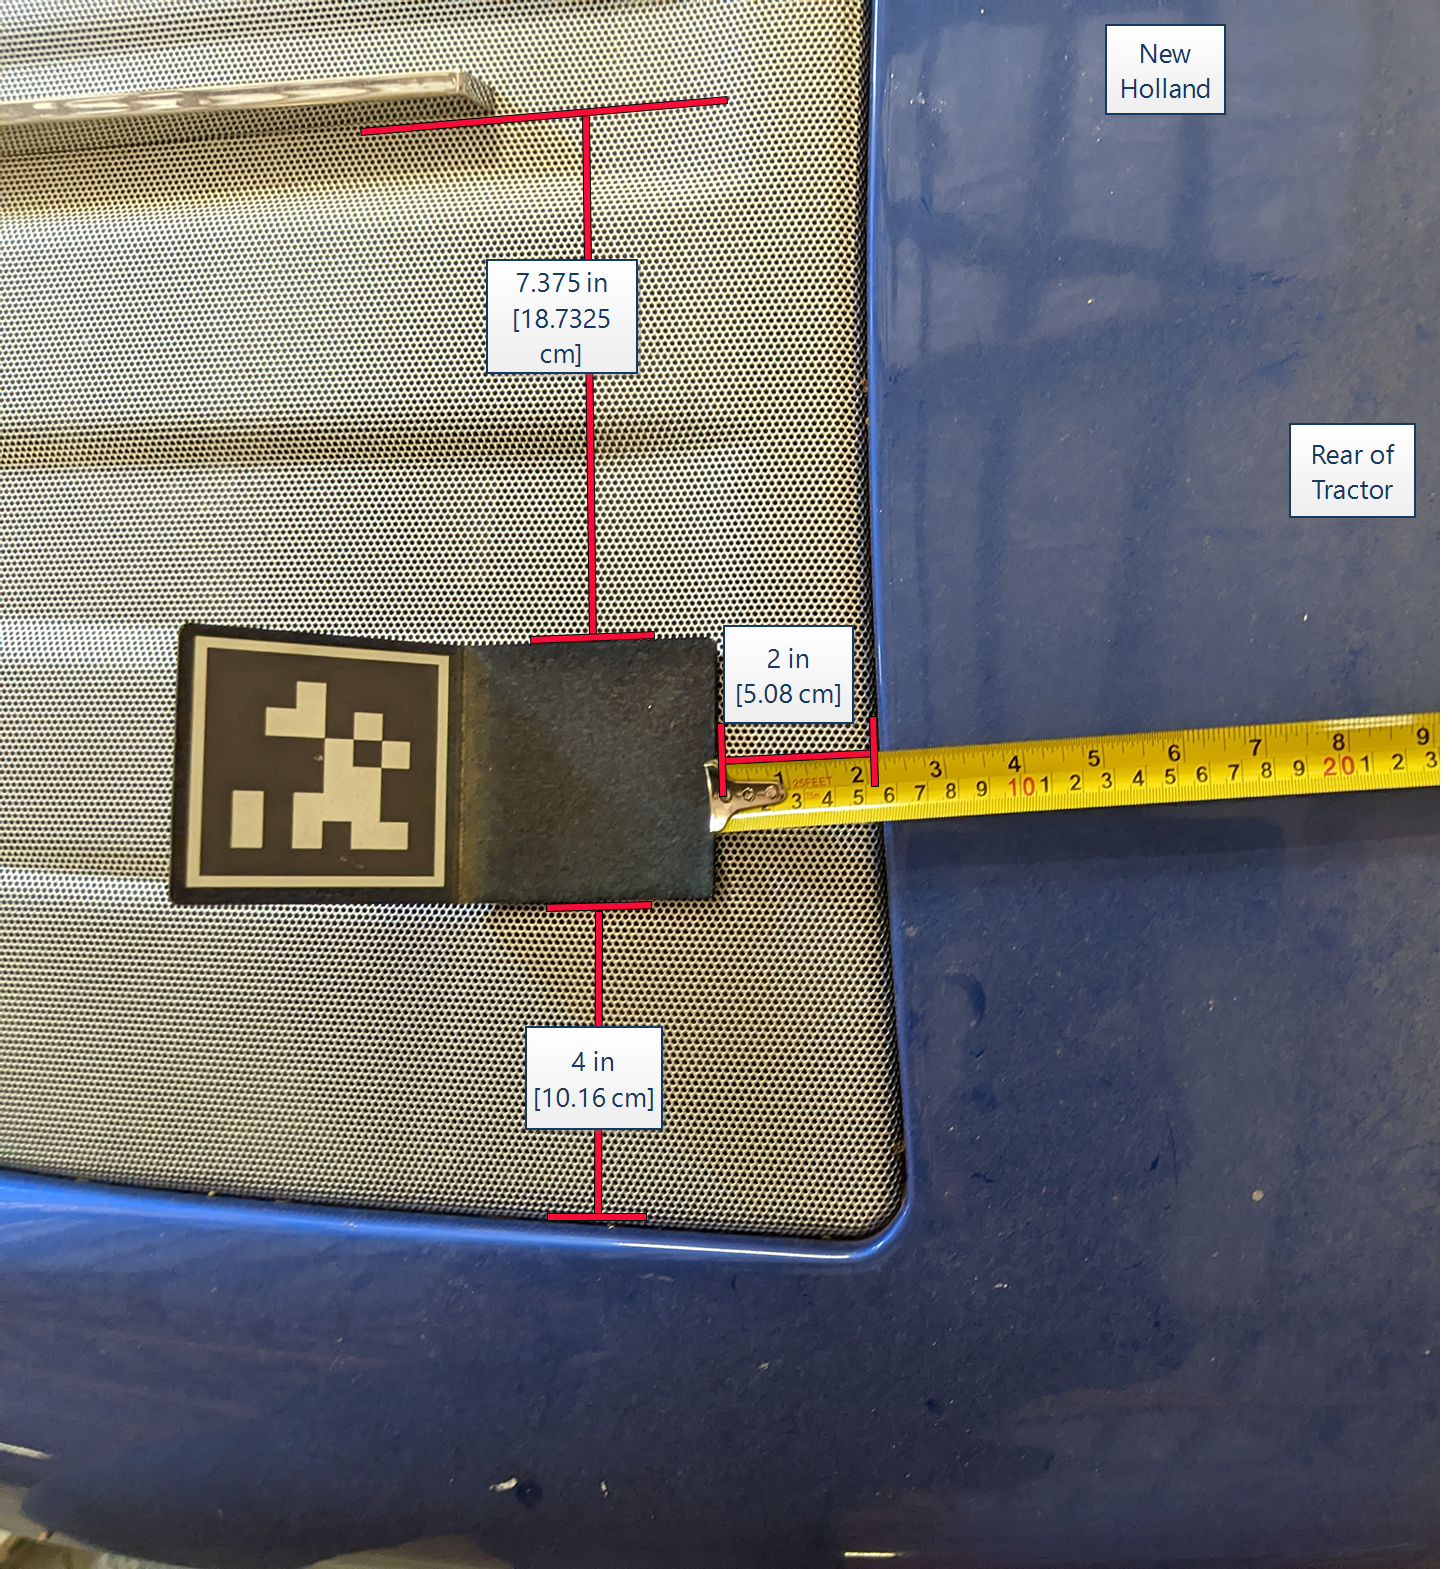
- Place the supplied AprilTag
 A specific system of fiducial markers used in robotics with visual or perception systems. OMNiDRIVE™ utilizes an AprilTag marker on the hood of the tractor with the Perception Controller. bracket (P/N 063-2610-020) on the hood of the tractor as shown in the picture below. Ensure the AprilTag code is visible to the cameras at the front of the cab.
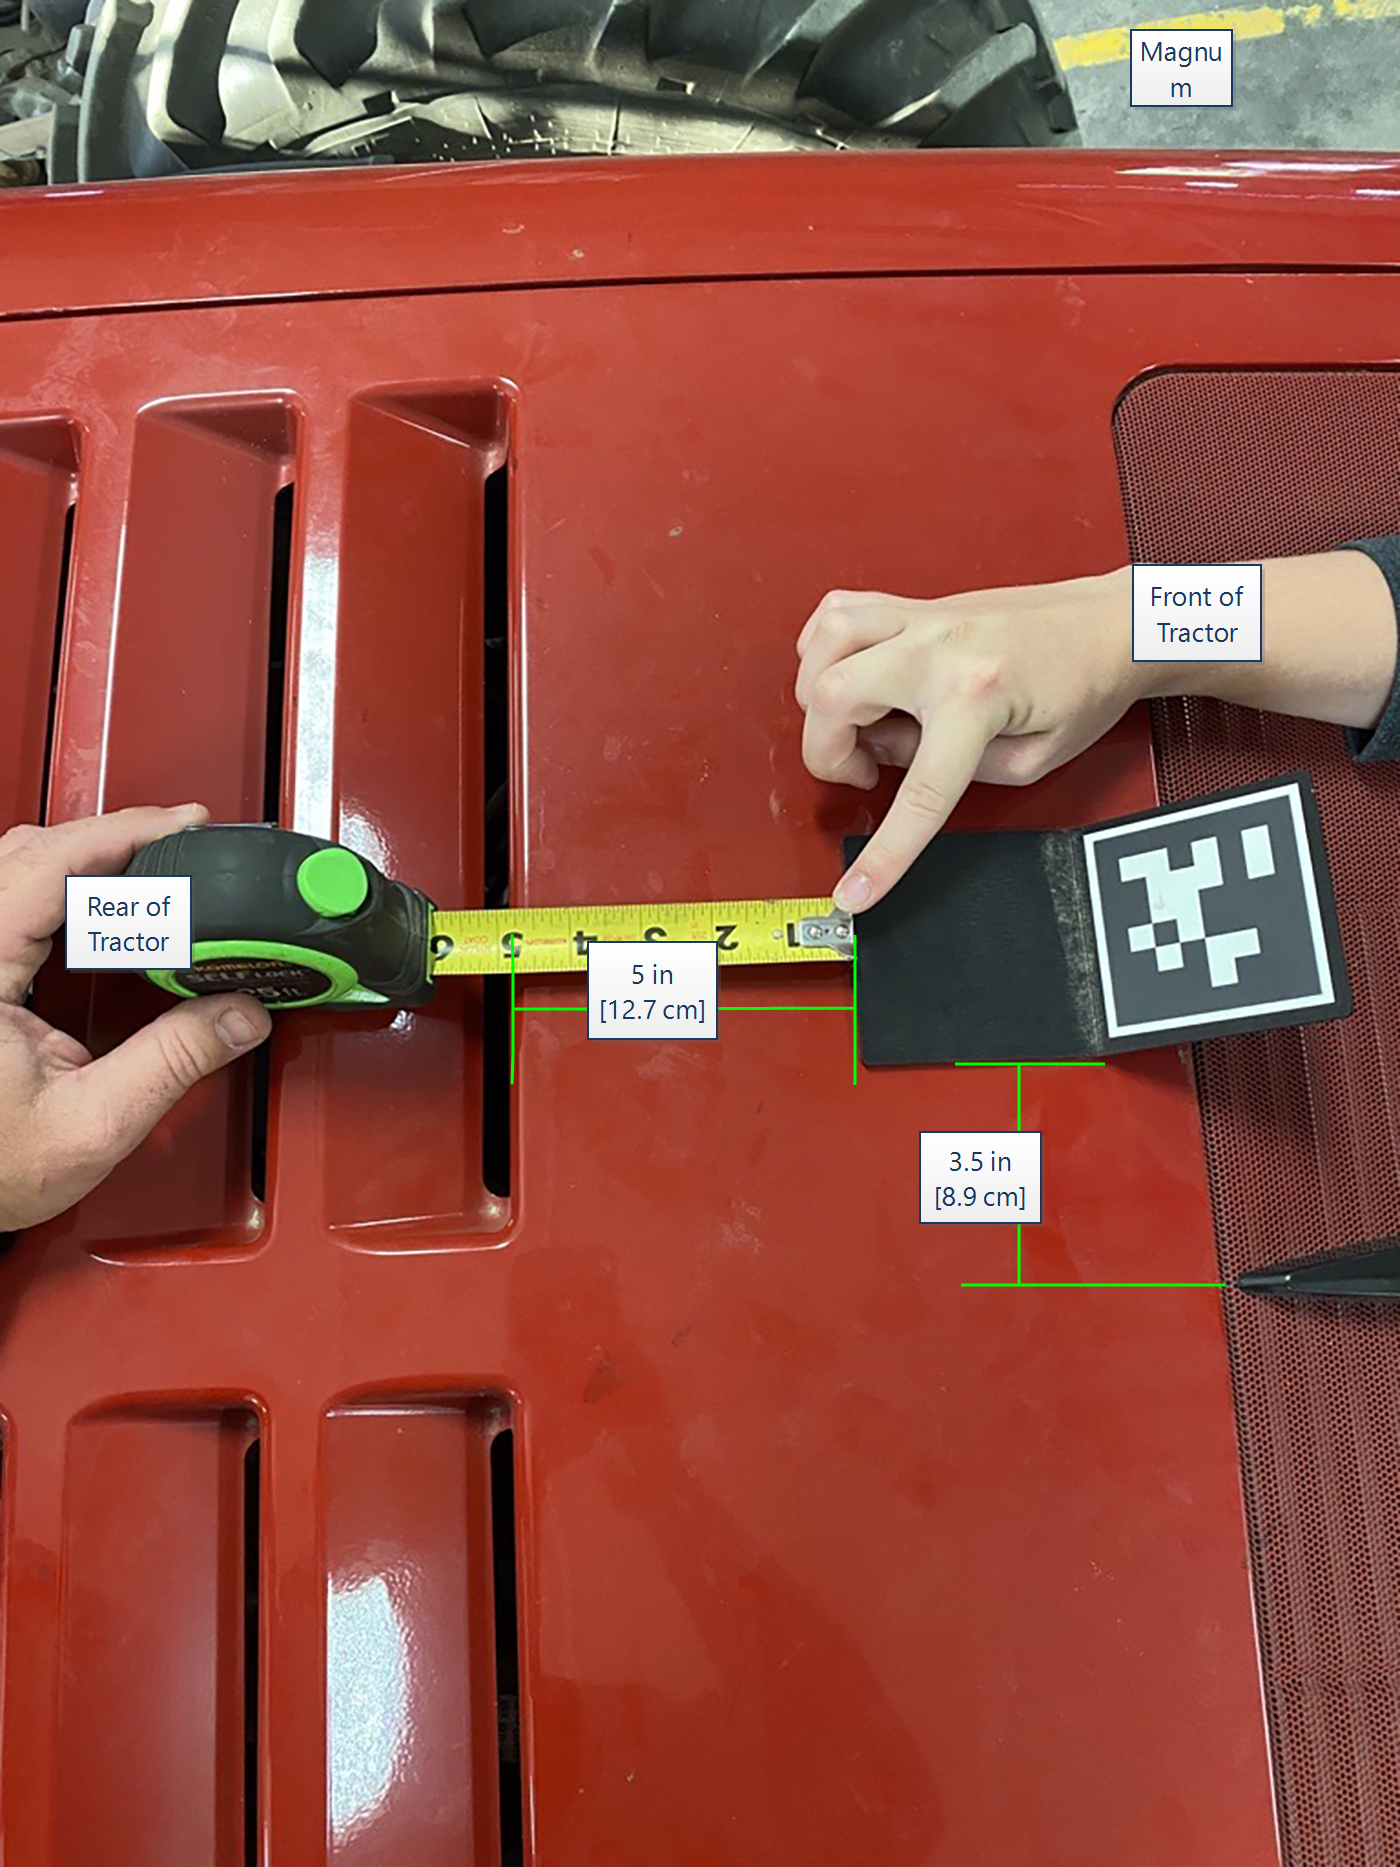
-
Last Revised: Jul 2024
“StarFire™ is a U.S. registered trademark of Deere & Company.”