Power the OMNiDRIVE™ System
|
caution |
|
|---|---|
|
|
Do not connect the system power cable to the vehicle ignition or battery until all system components are mounted and all electrical connections are completed. |
- Metric socket set - 5 to 24 mm
Battery Disconnect
|
|
|
|---|---|
|
|
The OMNiDRIVE™ system will draw power even when the tractor is shut down. Over time, this may drain the tractor battery. A battery disconnect is required to avoid damage to the tractor battery. |
Battery Cable and Device Plate Power
Note: Toggle the battery disconnect to the off state before connecting the OMNiDRIVE™ system to power.
- Connect the terminals labeled T7 and T8 on the MCM battery cable (P/N 115-2610-093) to the ground terminal in the battery compartment.
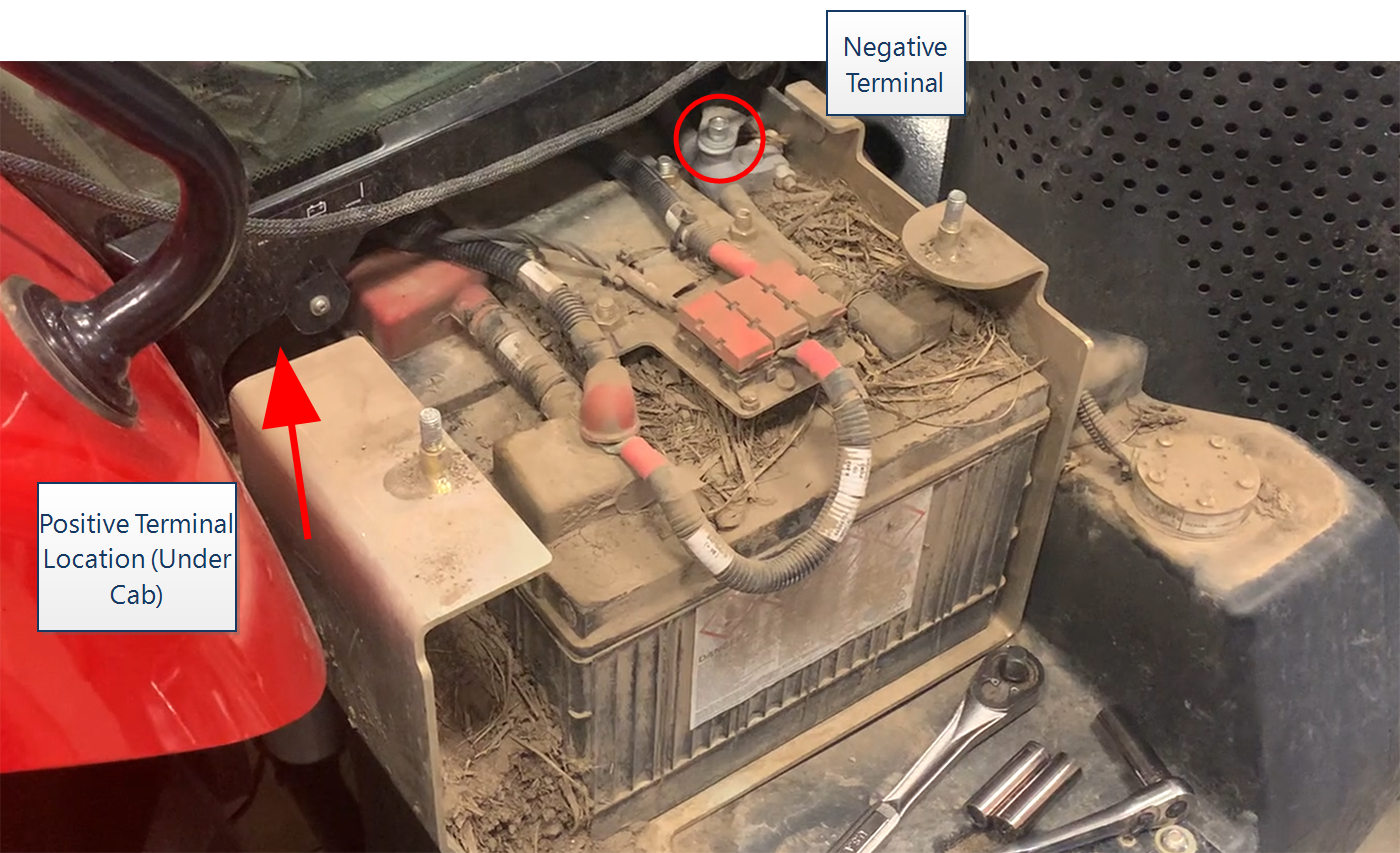
Note: The high current ground terminals are a 5/16 in. ring terminal.
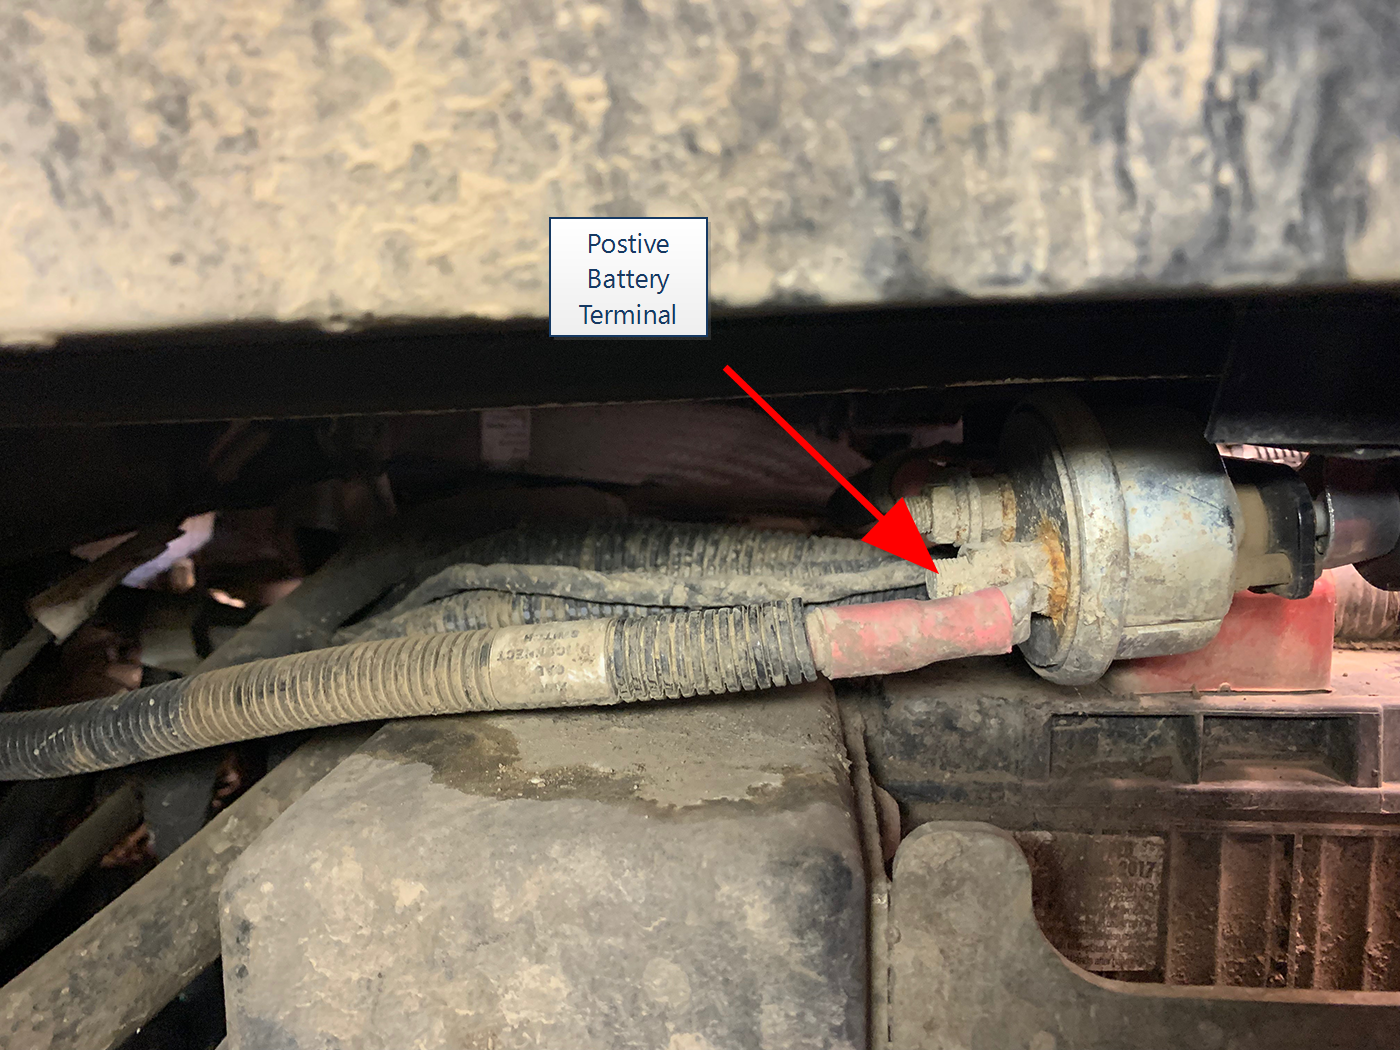
- Using a 15 mm wrench, connect the terminals labeled T5 HC
 high current POWER and T6 HC POWER on the MCM battery cable to the positive terminals located under the cab on the back side of the battery compartment.
 caution
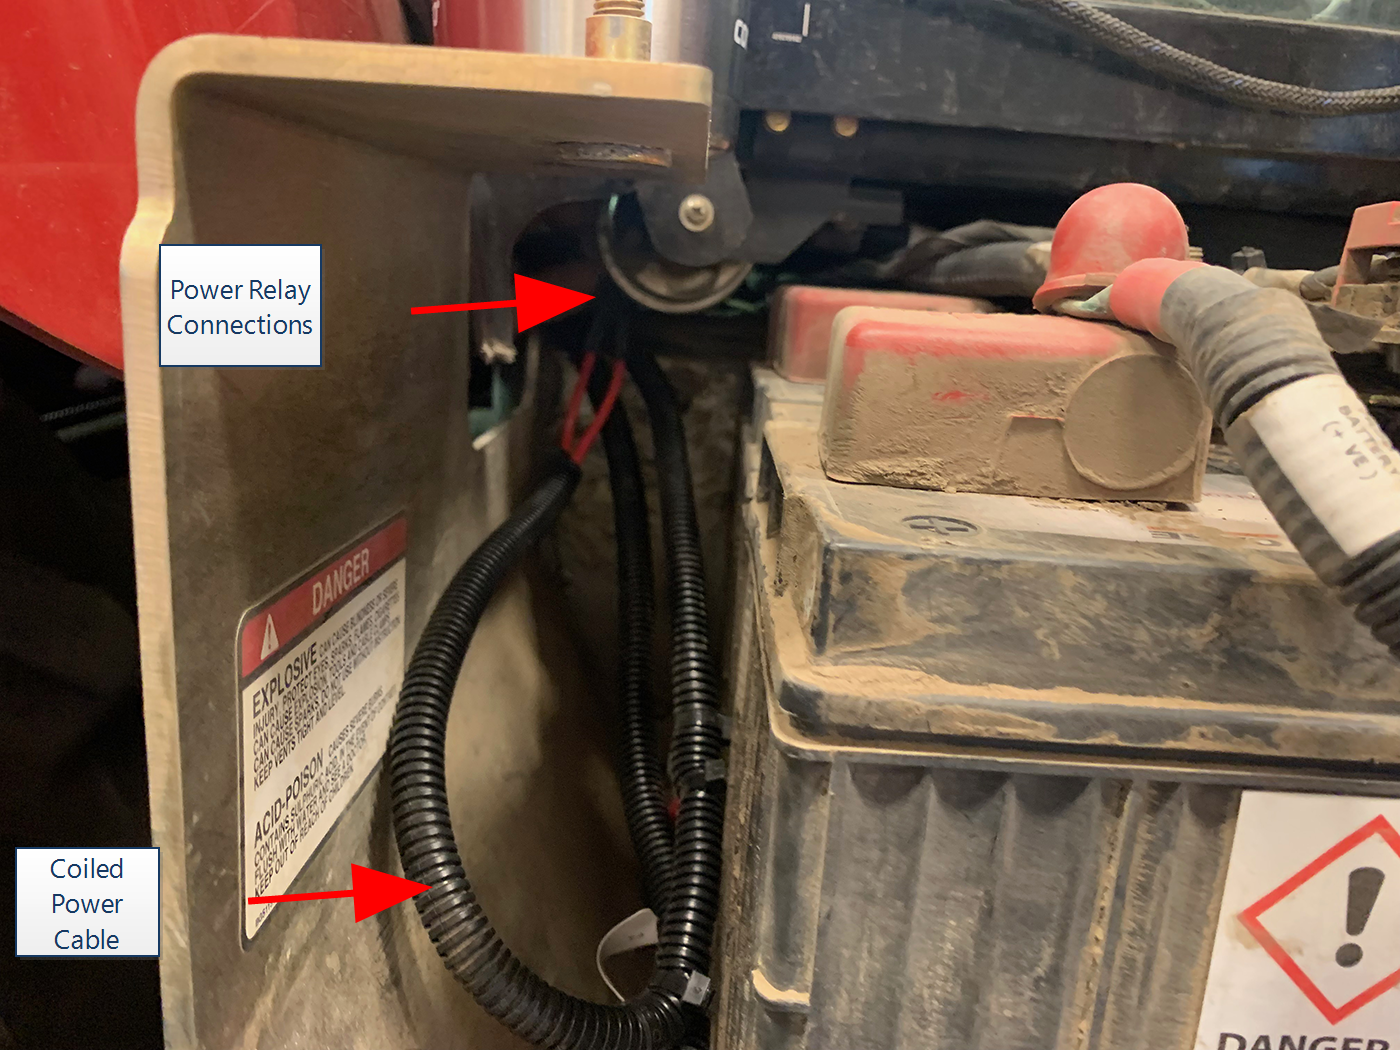
Corrosion and build up on the power relay module may make connecting OMNiDRIVE™ leads difficult. Use penetrating oil on studs and nuts before attempting to connect leads to the module.
Note: The high current power terminals are a 7/16 in. ring terminal.
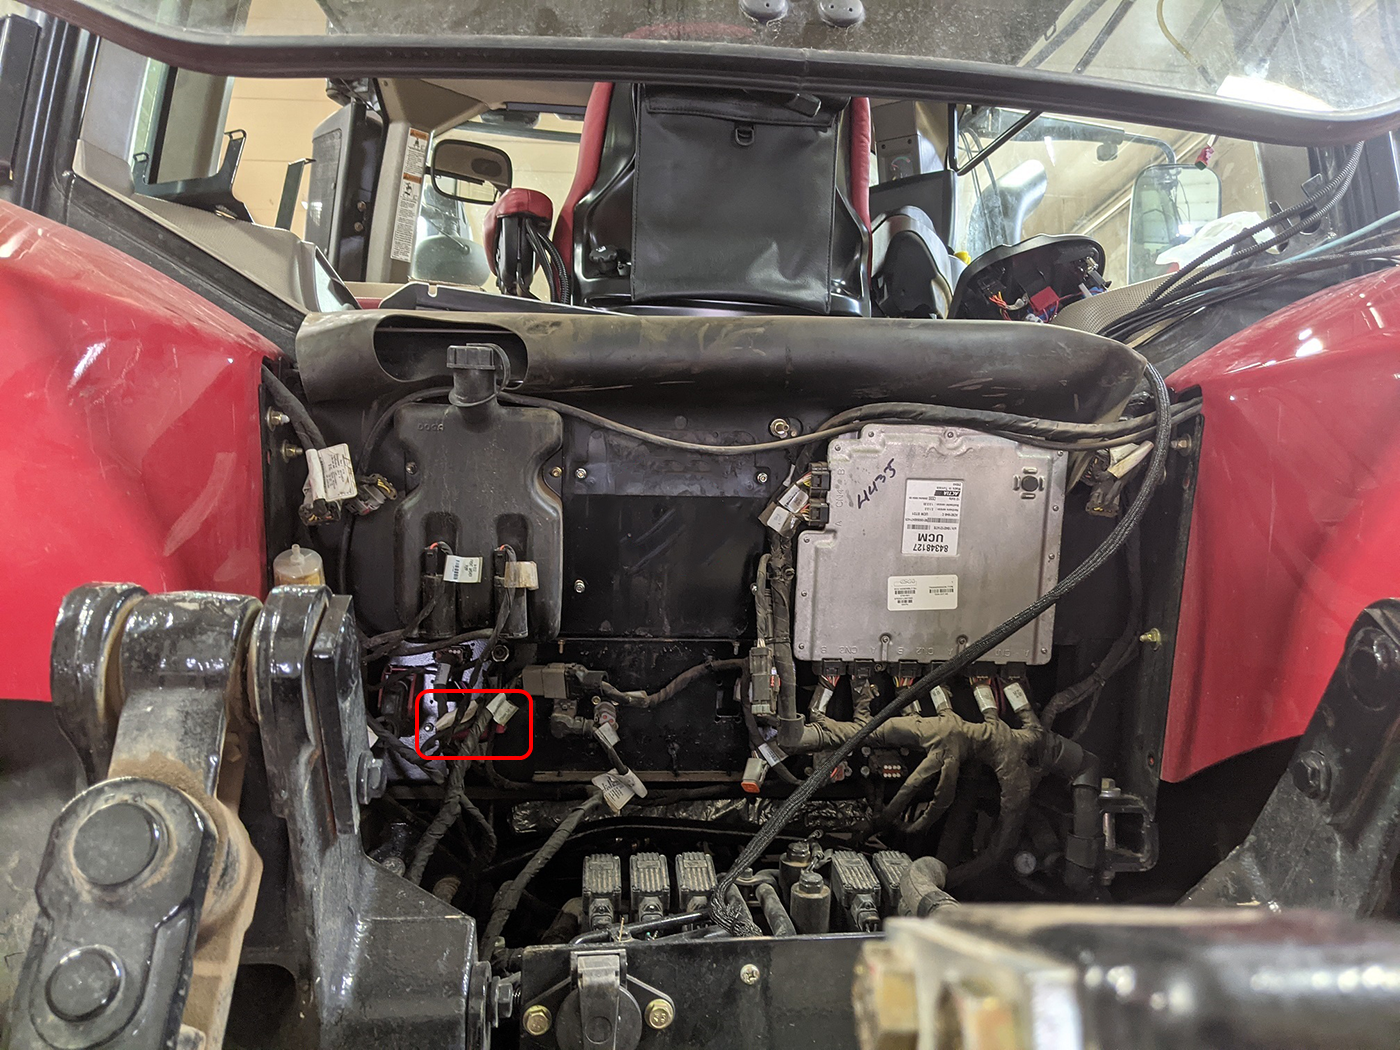
- Route the remaining ring terminals labeled T1 IGNITION and T2 IGNITION and the 8-pin connector under the tractor cab to the back of the tractor.
Note: Avoid components which generate excessive heat and hot hydraulic lines. Review Recommendations and Best Practices for additional information on routing and securing cables and harnesses. Secure the battery cable using the supplied zip ties as necessary.
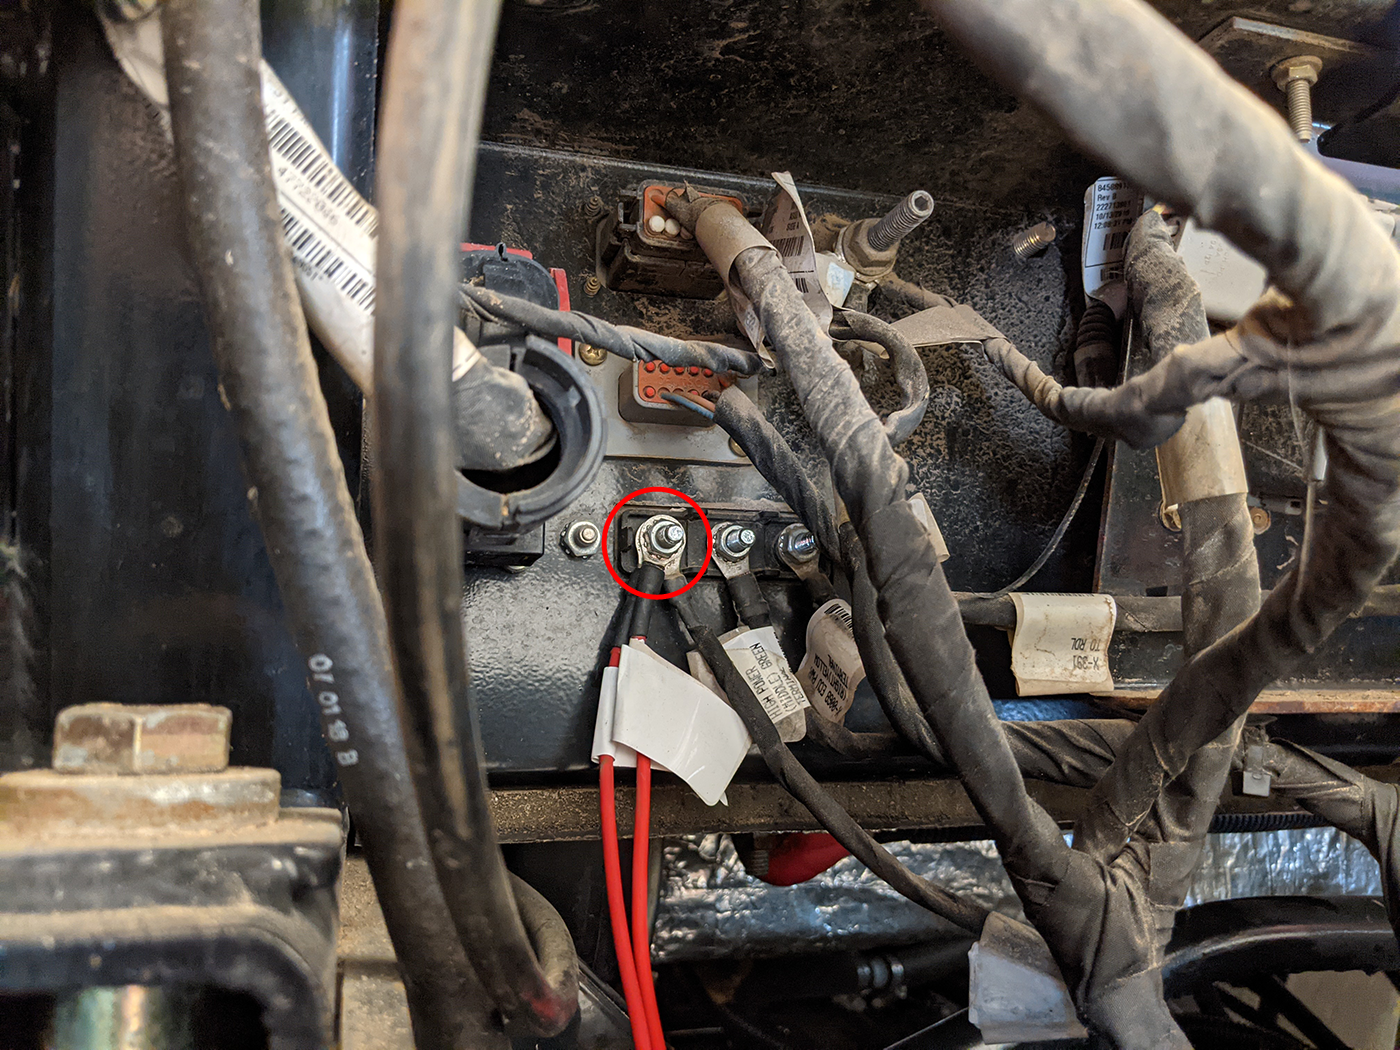
- Connect the T1 and T2 IGNITION ring terminals to the post located at the back of the machine as shown in the image below.
- Connect the circular, 8-pin X7F connector of the battery cable (P/N 115-2610-093) to the X7M connector on the main MCM harness (P/N 115-2610-092).
- Proceed to Validate the OMNiDRIVE™ System Install to complete the installation and make the tractor ready for the provisioning process.
Last Revised: Jul 2024